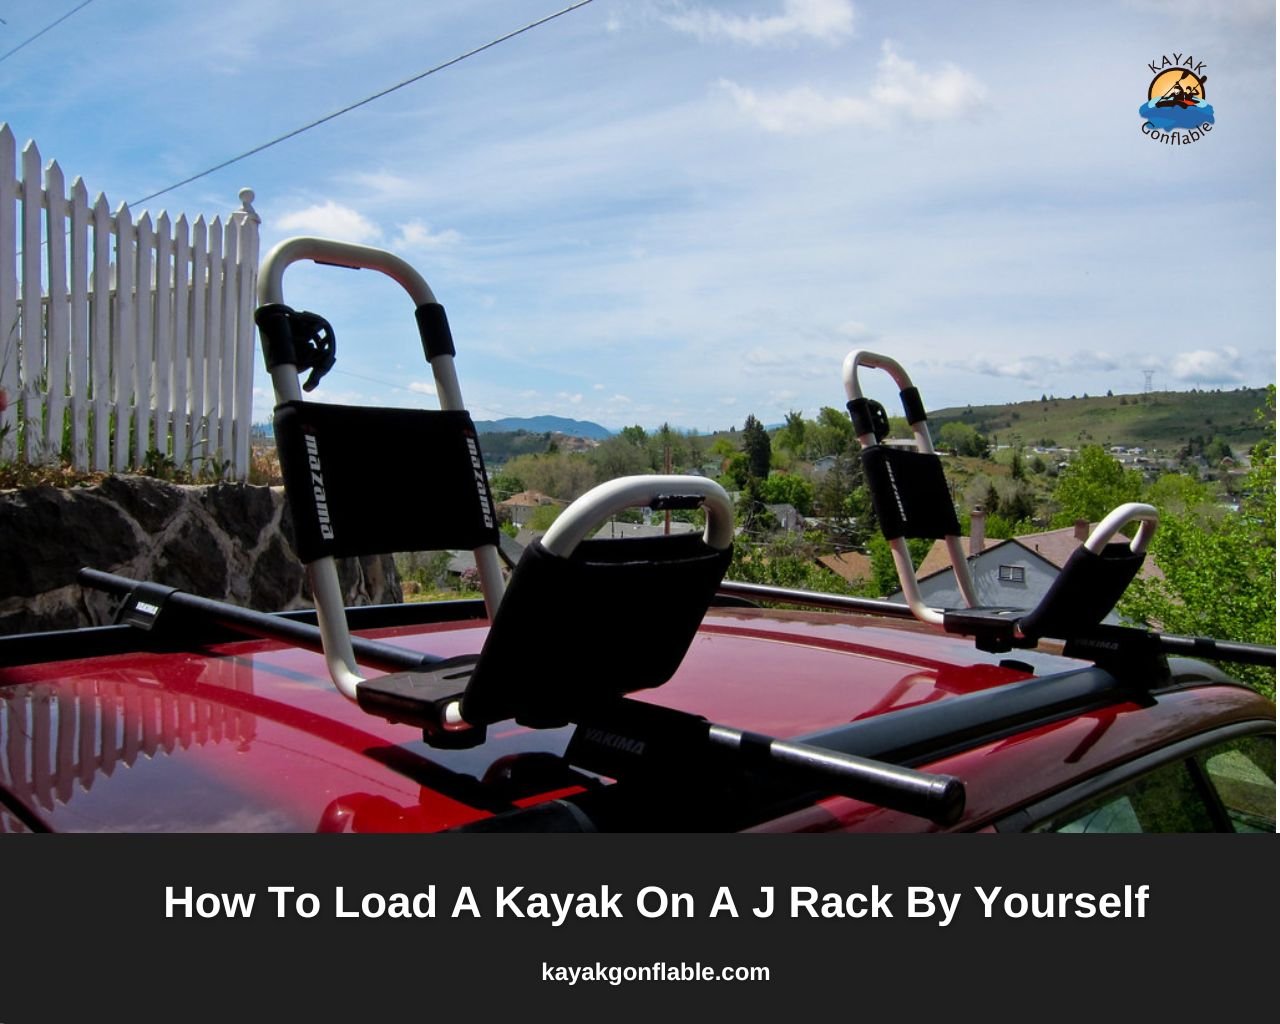
Cómo cargar un kayak en J Rack usted mismo
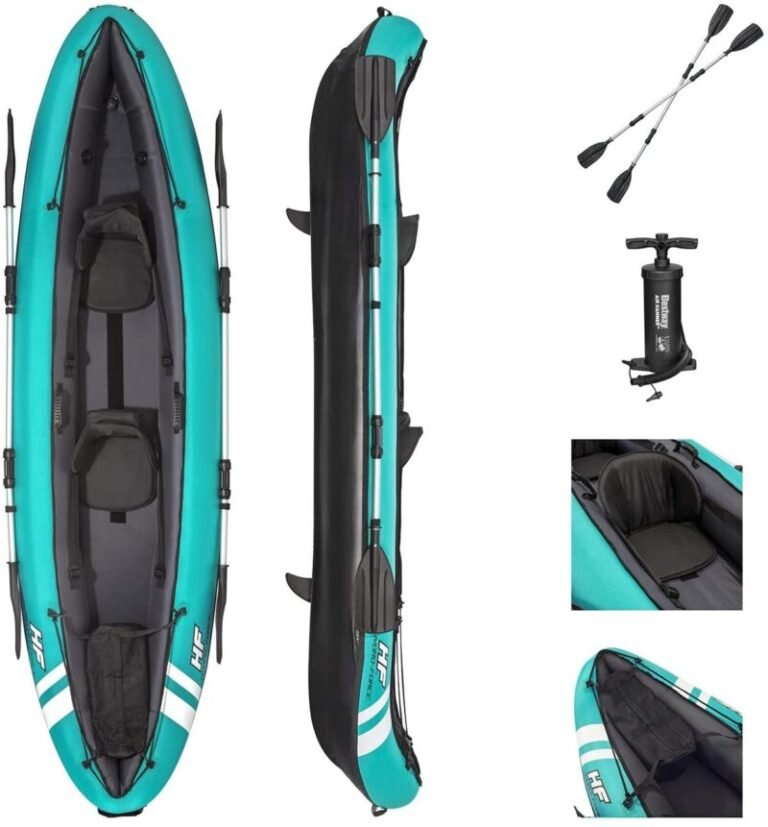
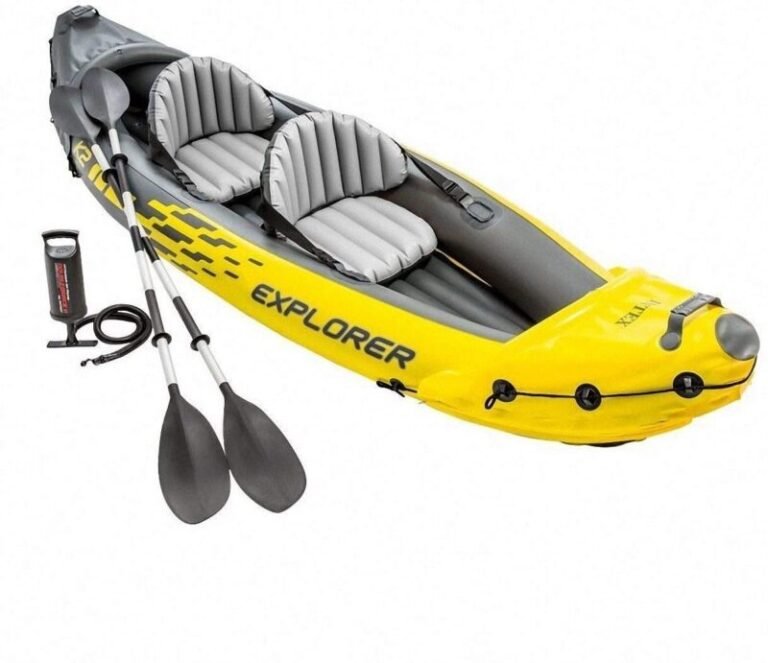
El kayak es un deporte de remo popular y divertido abierto a personas de todas las edades y niveles de condición física. Este deporte consiste en navegar en una embarcación estrecha llamada kayak a través de un cuerpo de agua con un remo de doble hoja y es una excelente manera de hacer ejercicio y divertirse.
A medida que los kayakistas se vuelven más adeptos a este deporte, buscan ampliar sus horizontes, y la única forma de hacerlo es navegar en kayak en diferentes cuerpos de agua para perfeccionar sus habilidades.
Incluso los kayakistas que no están preocupados por ampliar sus horizontes la mayoría de las veces tienen que llevar sus embarcaciones al agua, y eso es lo que nos lleva al tema de hoy.
Transportar kayaks es una parte integral de la vida de muchos kayakistas y hacerlo bien es de suma importancia. Naturalmente, a lo largo de los años han surgido varias formas de transportar kayaks de forma segura, pero quizás la más famosa de ellas sea el uso de un portaequipajes para kayak para transportar la embarcación.
Se colocan portaequipajes en la parte superior de los vehículos, luego se les acoplan kayaks y el transporte se vuelve muy sencillo. Uno de los tipos más populares de portaequipajes es el portaequipajes J.
Por lo tanto, no debería sorprender que saber cómo utilizar uno sea un conocimiento importante que todo kayakista debería poseer, especialmente si ya tiene un soporte J o está considerando utilizar un soporte J como una forma fácil y asequible de transportar su embarcación.
Todo lo que necesita saber para utilizar con éxito un soporte J para transportar su kayak está disponible en este artículo. ¡Sigue leyendo y disfruta!
¿Qué es la baca AJ?
La baca AJ es un tipo de baca diseñada para montarse en el techo de un vehículo. Por lo general, está hecho de aluminio o acero y consta de dos rieles laterales que van desde la parte delantera hasta la parte trasera del vehículo y una barra transversal que recorre todo el ancho del vehículo.
La baca J lleva el nombre de su perfil en forma de J, que ayuda a proporcionar estabilidad y resistencia al transportar cargas pesadas. Las bacas en J se utilizan a menudo para transportar bicicletas, kayaks, esquís, tablas de snowboard y otros equipos.
Por lo general, los utilizan personas que participan en actividades al aire libre como acampar, hacer caminatas y pescar.
Los pros y los contras de la baca J
Como ocurre con todo, los bastidores J tienen ventajas y desventajas en su uso. Si aún no has comprado un portaequipajes en forma de J, es posible que desees consultar ambos para ayudarte a decidir si este tipo de portaequipajes es para ti.
Ventajas
Si está buscando una nueva baca para el techo, es posible que se pregunte si la baca J es la opción correcta para usted. Estas son algunas de las ventajas de elegir una baca J:
- Son fáciles de instalar: puede hacerlo usted mismo en tan solo unos minutos.
- Son muy versátiles: puedes usarlos para todo, desde transportar equipaje hasta transportar kayaks y bicicletas.
- Son fáciles de almacenar: puedes desmontarlos fácilmente y guardarlos cuando no los uses.
- A menudo vienen con una garantía de por vida para su tranquilidad.
- La baca J se puede utilizar en prácticamente cualquier vehículo.
- Son una de las bacas de techo más asequibles del mercado.
- La baca J es muy resistente y puede soportar mucho peso.
- Proporciona a los ocupantes del vehículo un fácil acceso a su equipaje.
- Ayuda a mantener el automóvil limpio al garantizar que el equipaje se mantenga alejado del piso.
Contras
La baca J es un tipo de portaequipajes muy popular entre los propietarios de automóviles. Sin embargo, existen algunas desventajas al utilizar este tipo de portaequipajes. Algunas desventajas de la baca J incluyen:
- No es tan fácil de cargar y descargar como otros tipos de estanterías.
- Puede resultar difícil de instalar, especialmente si no tienes experiencia en la instalación de soportes superiores para automóviles.
- Si no se instalan correctamente, pueden soltarse y caerse del vehículo, dañando potencialmente cosas y provocando accidentes.
- La baca J puede disminuir el ahorro de combustible porque genera resistencia en el automóvil.
- Puede ser ruidoso al conducir por la autopista o al moverse a velocidad de autopista, especialmente si no hay nada en la rejilla que ayude a desviar el viento.
- Requiere una buena cantidad de mantenimiento para su correcto funcionamiento.
Consejos para instalar AJ Rack
A continuación se ofrecen consejos para una instalación exitosa de su bastidor J.
- Considere la altura de su vehículo: si bien las bacas J son realmente versátiles y se pueden usar con prácticamente cualquier vehículo, deberá prestar especial atención a este detalle si desea aprovechar al máximo su baca. Por un lado, los bastidores J son más adecuados para vehículos pequeños como SUV y automóviles más pequeños. Esto se debe a que cargar un portaequipajes en forma de J requiere que levante el kayak a la altura del techo de su vehículo, por lo que cuanto más alto sea el vehículo, más difícil será cargar el portaequipajes en el techo, especialmente si no tiene un dispositivo de elevación para kayak.
- Asegúrese de que el portaequipajes J sea compatible con su vehículo: Aún así, en cuanto al vehículo en el que desea instalar el portaequipajes, la compatibilidad es un criterio muy importante. El primer problema aquí es que para que un vehículo pueda soportar una baca en forma de J, ya debe tener algunas barras transversales o algún tipo de baca en el techo. Esto se debe a que la baca J debe instalarse en un marco resistente y las barras transversales en el techo de un vehículo suelen ser las mejores que se pueden conseguir. La otra parte de la ecuación es asegurarse de que el portaequipajes en forma de J que obtenga se ajuste a las medidas del techo de su vehículo. Si bien esto puede parecer gracioso, estos errores ocurren, así que asegúrese de verificar las medidas antes de realizar la compra.
- La orientación del estante J: Por diseño, los estantes J tienen un lado alto y un lado bajo, con un área plana acolchada en el medio donde descansarán las bordas de su kayak una vez que esté cargado en el estante. Como habrás adivinado, la orientación en la que instales el bastidor J determinará la dirección desde la cual podrás cargarlo de forma segura. Si instala el portaequipajes con el lado superior hacia afuera y alejado del centro del vehículo, lo más probable es que tenga que cargar el portaequipajes desde la parte trasera del vehículo. Sin embargo, si instala su portaequipajes J con el lado más alto hacia el centro del vehículo, cargará su kayak en el portaequipajes desde los lados. Recomendamos esto último, ya que de esa manera, si necesita altura adicional al cargar sus kayaks, puede subirse al corredor del vehículo o entrar en la puerta y estará listo para comenzar.
- Sigue el manual de instrucciones: Independientemente de tu experiencia en este tipo de cosas, te recomendamos seguir estrictamente las instrucciones que encontrarás en el manual. No hacerlo podría provocar problemas graves, así que haga lo inteligente y obedezca al fabricante. Lea el manual de instrucciones antes de comenzar la instalación y consúltelo en cada paso del camino para asegurarse de que está haciendo las cosas bien.
- Apretar el bastidor: Como los bastidores J no requieren mucho hardware para instalarse, debe apretar los tornillos a mano. Esto suele ser una buena noticia, pero dependiendo de la configuración de las barras transversales del techo de su vehículo, podría tener un problema grave entre manos. Debes asegurarte de que los tornillos estén bien apretados porque si no lo haces y no lo están, podrías correr el riesgo de que el portaequipajes gire mientras conduces, comprometiendo así la seguridad de los kayaks que se transportan o, peor aún, que el portaequipajes se caiga del techo. y dañar su kayak y provocar accidentes.
- Tómate tu tiempo: teniendo en cuenta que la baca se utilizará para transportar tu moto acuática y que cualquier desliz podría ocasionar problemas en el futuro, lo mejor es que te tomes tu tiempo durante el proceso de instalación para asegurarte de hacer todo bien. Verifique y verifique todo lo que haga para garantizar la firmeza del artilugio instalado y todo estará bien.
- Tenga cuidado: la precaución es esencial cuando se hace algo que vale la pena y, por lo tanto, es esencial aquí. Debe tener cuidado al instalar el portaequipajes en J para asegurarse de no dañar el portaequipajes, y debe tener cuidado incluso al cargar su kayak en el portaequipajes para evitar dañarlo.
- Seguridad: si vive en un lugar donde la seguridad es un problema, puede considerar comprar un bastidor J con mecanismo de bloqueo. Si bien inevitablemente costará más, valdrá la pena saber que su estante y todo lo que guarde en él está seguro.
Cómo cargar un kayak en el estante AJ usted mismo
Después de comprar e instalar su bastidor J, naturalmente estará desesperado por probarlo. La mejor manera de hacerlo será utilizarlo para lo que fue diseñado para transportar su kayak.
Si tienes un dispositivo para levantar kayak o alguien que te ayude, ¡genial! Facilitará su tarea y le ahorrará muchos problemas.
Sin embargo, si usted es un kayakista solitario o está solo cuando carga su kayak en el portaequipajes, lo mejor para usted es saber cómo hacerlo correctamente.
Como existen varias marcas, las instrucciones sobre la mejor manera de cargar el bastidor J probablemente estarán en el manual de instrucciones y estará listo para comenzar.
Para ayudar a acelerar el proceso, se explica cómo cargar un kayak usted mismo en un soporte J; tanto para aquellos que prefieren cargar su kayak desde el lateral (como se recomienda) como aquellos que prefieren cargar sus kayaks desde la parte trasera.
Posicionando el kayak
Independientemente de si prefiere cargar su kayak desde el costado o desde atrás, el primer paso para cargarlo con éxito es colocarlo correctamente.
Esto se refiere a colocar el kayak en una posición ventajosa de modo que sea más fácil levantarlo sobre la baca y tenga menos posibilidades de dejar caer la embarcación y dañarla o, peor aún, lesionarse.
Como puedes imaginar, la posición óptima varía según el tipo de kayak y portaequipajes. Sin embargo, en general, la posición óptima para cargar un kayak en un soporte J es colocarlo en el suelo con la cara hacia arriba.
Cargando desde el costado
En este estilo de carga, debes levantar el kayak del suelo y luego girarlo hacia ti a medida que asciendes. Para una ejecución adecuada, debes colocar el kayak en el suelo con la proa mirando en la dirección en la que te moverás después de levantar el kayak.
Debes doblar las rodillas y agacharte mientras mantienes la espalda recta. Agarrando el borde del kayak más cercano a ti, debes levantarte, manteniendo aún las rodillas dobladas y la espalda recta, luego coloca el kayak sobre tus muslos.
Luego debes alcanzar el otro borde del kayak y agarrarlo, hacer rodar el kayak mientras lo colocas sobre tu hombro.
Asegúrate de que el borde del kayak descanse sobre tu hombro y de mantener la espalda recta. Ahora puedes pasar al coche y cargar suavemente el kayak en el soporte J.
Consejo: Usar su dispositivo de flotación personal durante el levantamiento le ayudará a proporcionar un cojín para sus hombros, reduciendo la tensión general que ejerce sobre su cuerpo.
Si bien esto te ayudará a cargar tu kayak solo, puede ser muy difícil, especialmente si tienes un kayak pesado o si eres un remero pequeño. Por eso cargar desde un lado es más fácil cuando tienes pareja.
Si tenéis pareja, primero debéis posicionar el kayak en el suelo, después posicionaos vosotros en el mismo lado del kayak en cualquiera de sus extremos (la proa y la popa).
Luego, doblando las rodillas y agachándote, ambos debéis agarrar el borde más cercano a vosotros y luego levantar el kayak hasta los muslos. Recuerda mantener la espalda recta.
A medida que levantas el kayak de tus muslos y te levantas, necesitarás coordinar tus movimientos para poder colocar la borda del kayak en el soporte J.
Si uno de ustedes es más alto, primero debe colocar el extremo del kayak en el soporte J. De esa manera, él podrá ayudar fácilmente a colocar la otra parte del kayak en su posición y estará listo para comenzar.
Cargar con un compañero requiere comunicación y sincronización, así que asegúrate de tener muchas de ambas, o podrías dañar el kayak.
Cargando desde el Trasero
Como probablemente habrás adivinado, esta técnica se adapta mejor a los kayakistas solitarios y es una excelente alternativa a cargar un kayak pesado desde un costado. Al igual que con la técnica anterior, se empieza colocando el kayak en el suelo boca arriba.
Luego alineas la proa del kayak con el parachoques del vehículo y colocas almohadillas debajo de la popa del kayak. Las almohadillas ayudan a proteger la popa de daños al levantar la proa del kayak hacia el soporte J.
Como deslizará el kayak hacia adelante, es inteligente colocar almohadillas a dos o tres pies de la popa para garantizar la máxima protección.
Una vez que todo esté listo, puedes levantar el arco y colocarlo en la rejilla J. La proa debe estar firmemente colocada en el canal del soporte J antes de levantar la popa, ya que de lo contrario corre el riesgo de que el kayak se deslice hacia abajo y se dañe.
Una vez que esté seguro de que la proa está asegurada, muévase hacia la popa. Debes levantar con cuidado la popa mientras empujas hacia adelante y girar el kayak para que la borda encaje en el canal del portaequipajes.
La rotación y el ajuste de la borda son importantes ya que una vez logrado, resulta más fácil deslizar el kayak hacia adelante. Si tiene un vehículo más largo, es posible que desee colocar el kayak en ángulo con respecto a la parte trasera del vehículo en lugar de hacerlo en paralelo.
De esa forma, podrás aplicar más fuerza y empujar el kayak hacia el centro del techo del vehículo. Esta técnica también reduce las posibilidades de que el kayak se deslice una vez que esté en su lugar.
Si eres un ávido kayakista, sabes la importancia de poder cargar tu kayak en tu coche por ti mismo. Esto se vuelve especialmente importante si vas a realizar un viaje en solitario.
Si bien puede parecer desalentador al principio, cargar un kayak en un soporte J usted mismo es bastante fácil una vez que sabe cómo hacerlo. Con un poco de práctica, podrás cargar tu kayak tú mismo en poco tiempo.
Después de cargar el kayak, asegúrese de asegurarlo con correas o una cuerda fuerte y luego obedezca todas las reglas de transporte mientras esté en la carretera. Utilice siempre prácticas seguras de navegación en kayak y diviértase en el agua. Gracias por leer.