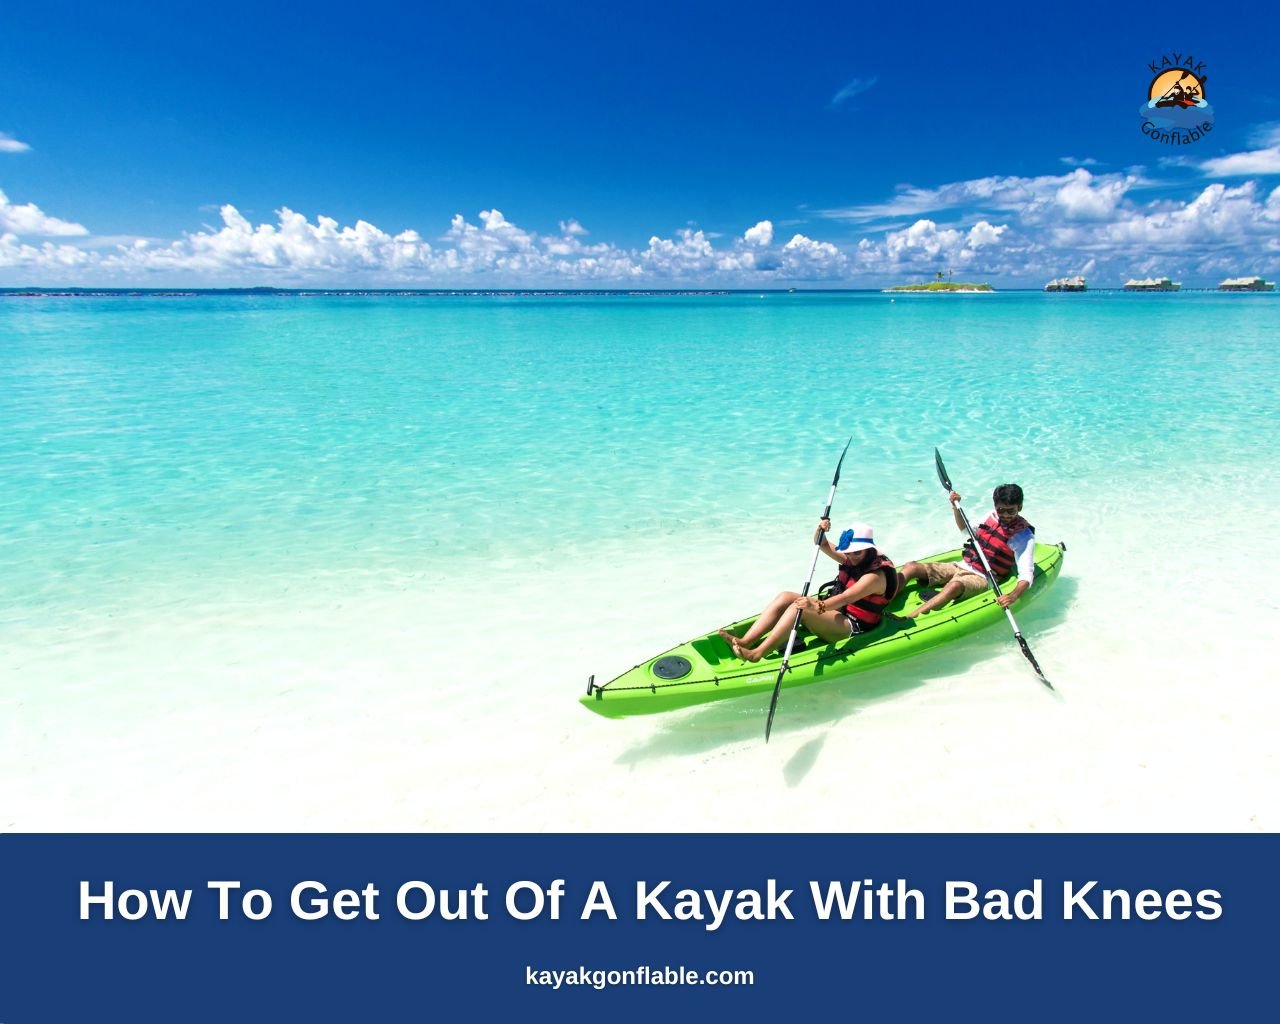
Cómo salir de un kayak con malas rodillas
Si bien el kayak es un deporte de remo divertido, como todo, también tiene algunos aspectos complicados, uno de los cuales es subir y bajar del kayak. Estos esfuerzos aparentemente mundanos no son las cosas más fáciles de lograr incluso para los kayakistas perfectamente sanos.
Entonces, si tienes problemas en las rodillas, es un hecho que te resultará difícil entrar y salir del kayak.
Afortunadamente, a lo largo de los años se han inventado varios consejos para hacer el calvario más llevadero y hacer que subir y bajar de un kayak sea lo menos doloroso posible, para que no tengas que renunciar a tu deporte favorito sólo porque tus rodillas no sean tan fuertes como Ellos solían ser.
Hoy analizamos el kayak con problemas de rodillas y los consejos que debes tener en cuenta para que tu experiencia sea lo más cómoda posible. Continúe leyendo y recuerde que no tiene por qué renunciar al placer del kayak por problemas en las rodillas.
Cómo salir de un kayak con malas rodillas
Después de subirse con éxito a su kayak y remar a su antojo, es hora de salir de su kayak y afrontar el resto del día.
Saber cómo salir del kayak de forma segura es muy importante si tienes problemas de rodilla, ya que cualquier movimiento en falso podría ejercer una presión innecesaria sobre tus rodillas y ponerte en un mundo de dolor.
A continuación se explican algunos métodos de salida que le harán la vida más fácil, así que siga leyendo y elija el que mejor se adapte a sus necesidades. Recuerda practicar las técnicas de salida en condiciones controladas antes de elegir una y tener que realizarla en tiempo real.
La salida de aguas poco profundas
Como su nombre indica, esta técnica de salida se realiza en aguas poco profundas, por lo que debes abstenerte de dejar que la proa del kayak llegue a la orilla o orilla.
La profundidad del agua debe estar entre 6 y 12 pulgadas, y puedes medirla con tu remo (puedes marcar la distancia requerida con un marcador permanente u otra sustancia de antemano).
Una vez que todo esté bien, balancee las piernas hacia cada lado del kayak (no importa de qué lado), luego gire el cuerpo hasta que esté perpendicular al kayak.
A continuación, te deslizas hasta el borde del kayak y puedes usar el remo como apoyo o dejarlo caer y empujar el kayak para levantarte. Como ya está sentado en aguas poco profundas, ponerse de pie se vuelve más fácil y experimenta menos tensión.
La salida de natación
Como su nombre lo indica, esta técnica de salida requiere que vayas a nadar, por lo que solo debes emplearla en días calurosos o cuando no te importe mojarte. La técnica se lleva a cabo en aguas poco profundas que llegan hasta la cintura, es decir, aproximadamente la mitad de la longitud de la pala.
Como la técnica requiere nadar, asegúrese de que su chaleco salvavidas está correctamente instalado y el agua está libre de obstáculos. No querrás lastimarte ahora.
A continuación, debes sacar tu cuerpo del kayak y meterlo en el agua. En otras palabras, das la vuelta al barco y luego te das un baño.
Como se encuentra en aguas poco profundas, podrá encontrar fácilmente el suelo con los pies y luego podrá ponerse de pie con una tensión considerablemente menor en las piernas. Una vez más, puedes utilizar el remo como apoyo si así lo deseas para facilitar el proceso de ponerse de pie.
Laminación fuera de tu kayak correctamente sin lastimarse requiere un conocimiento adecuado de la salida húmeda, así que asegúrese de repasar antes de intentar esta técnica. Luego podrás empujar tu kayak hasta la orilla.
La ayuda de un amigo sale
Si practicas kayak con un amigo que tiene mejores rodillas y no quieres mojarte, entonces esta técnica de salida es para ti. El método consiste en remar a mayor velocidad a medida que nos acercamos a la orilla, de modo que una parte del casco descanse en tierra firme.
A continuación, dejas caer el remo y balanceas las piernas hacia cada lado del kayak, de modo que quedes perpendicular al barco. Ahora llama a tu amigo y espera pacientemente su llegada.
Una vez que llegue tu amigo, debe asumir una posición estable con los pies abiertos y las rodillas dobladas. Luego deben agarrarse de los antebrazos del otro y hacer una cuenta regresiva juntos para sincronizar sus movimientos.
Cuando ambos estén listos, su amigo debe levantarlos y no soltarlos hasta que estén seguros de que no perderán el equilibrio.
Como la mayoría de las playas y costas están inclinadas, habrá más tensión en la rodilla cuesta abajo al salir del kayak, por lo que debes asegurarte de que tu rodilla buena sea la que esté cuesta abajo.
Digamos, por ejemplo, que su rodilla derecha está peor que la izquierda, querrá salir del kayak por la izquierda para que su rodilla izquierda experimente la mayor tensión y viceversa.
La salida de arrastre
Este método debería ser su último recurso. Al igual que en el método anterior, ganas impulso a medida que te acercas a la costa, de modo que una parte del casco queda en la orilla, y mueves las piernas hacia un lado de la embarcación.
Ahora, si puedes lograrlo, colocas las manos a los lados del casco y las usas como apoyo mientras te pones de pie lentamente. Si su problema de rodilla no es tan grave, debería poder controlarlo. Pero si ocurre lo contrario, entonces saldrás arrastrándote del kayak, como sugiere el nombre de la técnica.
Una vez que esté sentado perpendicular al kayak y sus pies a un lado del kayak, gire hacia la orilla de modo que su vientre quede sobre el kayak en una posición similar a la de alguien que se cayó de su kayak y simplemente volvió a subir.
A continuación, retrocede suavemente sobre manos y rodillas y gatea hasta un lugar donde pueda pararse fácilmente. Si bien este método ofrece un espectáculo a quienes te rodean, es innegable que hace el trabajo, especialmente si no hay una cara familiar cerca y no quieres pedir ayuda.
Dicho esto, simplemente tendrás que pedir ayuda a alguien y no tendrás que montar un espectáculo. Si bien algunas condiciones médicas pueden impedirle experimentar los placeres del kayak, aparte de los casos extremos, los problemas de rodillas no figuran en esa lista.
Sin embargo, hacer que su experiencia sea lo más cómoda posible depende de usted, así que asegúrese de pecar de precavido. Emplee prácticas seguras de kayak y no exceda sus límites, y todo estará bien.
Cómo hacer kayak con malas rodillas
Si eres una persona que practica actividades al aire libre y tienes problemas en las rodillas, puedes pensar que tus días de kayak quedaron atrás. ¡Pero no temas! Hay formas de solucionar el dolor de rodilla y volver al agua.
Con un poco de esfuerzo y creatividad, puedes encontrar una manera de practicar kayak con problemas en las rodillas. A continuación se presentan algunas pautas que debe seguir si tiene problemas en las rodillas para facilitar su terrible experiencia.
Obtenga el consejo de su médico
Si usted es un ávido kayakista que recientemente comenzó a sentir dolor en las rodillas o si ya tiene problemas en las rodillas y espera comenzar a navegar en kayak, primero y ante todo debe visitar a su médico.
Su médico podrá decirle qué tan dañadas están sus rodillas y la causa probable. También le explicará lo que debe y no debe hacer en su situación para que pueda cuidarse mejor.
Si recién comienza a sentir el dolor, visite al médico para evitar empeorar su situación. Y si tiene la intención de practicar kayak con problemas en las rodillas, deje que su médico le indique la mejor manera de hacerlo.
Remar es una actividad extenuante y obtener la aprobación del médico puede ser de gran ayuda para tranquilizarlo y asegurarse de que goza de buena salud.
Elija el kayak adecuado
Dado que ya tienes problemas en las rodillas, disfrutar de una experiencia agradable en kayak puede depender en gran medida del tipo de kayak que elijas.
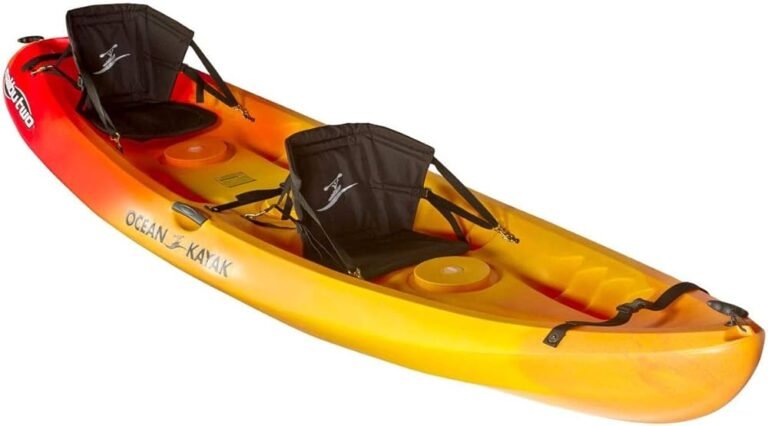
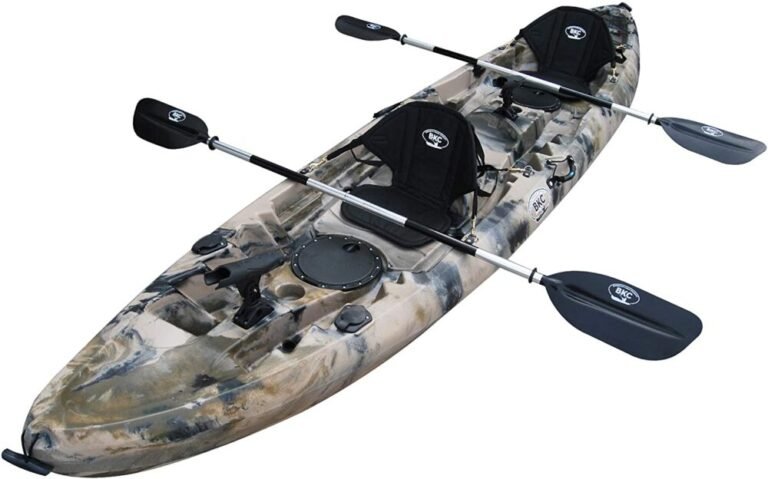
Si bien los kayaks con asiento son excelentes y lo protegen de los elementos, su diseño de cabina cerrada simplemente no es el mejor para usted, por lo que recomendamos utilizar un kayak con asiento.
Si eres un ávido kayakista y acabas de desarrollar problemas en las rodillas, probablemente puedas seguir usando un kayak sentado; lo único que pasa es que el diseño de cabina abierta de los kayaks con asiento encima será más cómodo para ti, ya que tendrás más libertad para moverte como quieras, el kayak te sostiene y, por lo tanto, ejercerá menos presión sobre tus rodillas; y lo más importante, es más fácil subir y bajar de los kayaks con asiento.
¿Son los kayaks inflables una buena opción para alguien con problemas de rodillas?
Todas las cosas consideradas, kayaks inflables Parece ser una gran opción para un kayakista con problemas en las rodillas. Son muy estables, se pueden transportar y almacenar fácilmente y se pueden utilizar en una amplia gama de condiciones de agua.
El único defecto aquí es que, a menos que tengan un piso antideslizante, puede ser difícil entrar y salir de ellos, lo cual es un problema importante para las personas con problemas de rodillas.
Por tanto, el veredicto depende de la gravedad de su malestar. sentarse encima kayaks inflables debería darle a cualquier kayakista con problemas de rodillas lo mejor de ambos mundos, pero si todavía le preocupa la incomodidad, siempre puede conseguir un kayak inflable con piso antideslizante.
Obtenga el equipo adecuado
No se puede exagerar este punto. Para aprovechar al máximo tu experiencia en kayak y hacerla lo más cómoda posible, debes conseguir el equipo adecuado, aunque eso signifique gastar más.
Obtenga equipo de calidad, incluido el kayak, el remo, el asiento con respaldo, rodilleras y otros equipos importantes. Quizás más importante que adquirir el equipo adecuado sea saber cómo utilizarlo.
Asegúrate de aprovechar al máximo tu equipo usándolo correctamente y tendrás una experiencia de remada agradable.
hacer ejercicio de estiramiento
Lo creas o no, los ejercicios de estiramiento ayudan a aflojar los músculos y eso hará que tu experiencia de remar sea más placentera.
Como la parte inferior de su cuerpo estará estacionaria durante la mayor parte de su aventura de remo, moverse después puede ser bastante difícil, especialmente para las personas con problemas en las rodillas.
Notarás que los ejercicios de estiramiento te ayudan a calentar y facilitan mucho los movimientos después de remar. Si ha pasado un tiempo desde la última vez que practicaste kayak, asegúrate de estirarte y calentar antes de entrar al agua y todo será más fácil.
Si practica kayak con frecuencia, cultive el hábito de estirarse diariamente antes y después de su aventura de remo y notará que su coordinación mejorará con el tiempo.
Obtenga entrenamiento o capacitación
Es posible que esto no se aplique a usted si es un kayakista experimentado que tiene problemas en las rodillas, pero si es nuevo en el kayak, recibir lecciones privadas de un kayakista experimentado puede ser de gran ayuda para aumentar su confianza.
Muchos instructores de kayak han tenido que ayudar a personas con discapacidad a disfrutar del kayak, por lo que tendrán la experiencia y los conocimientos necesarios para ayudarte.
El entrenador puede ayudarle a elegir el mejor equipo para usted y practicar sus técnicas de remo bajo una mirada experimentada siempre es una excelente manera de mejorar sus habilidades.
Elija con cuidado sus lugares de despegue y aterrizaje
La precaución se convierte en tu mejor amiga si eres un kayakista con problemas de rodilla y una de las mejores maneras de garantizar un viaje tranquilo es elegir sabiamente los lugares de despegue y aterrizaje.
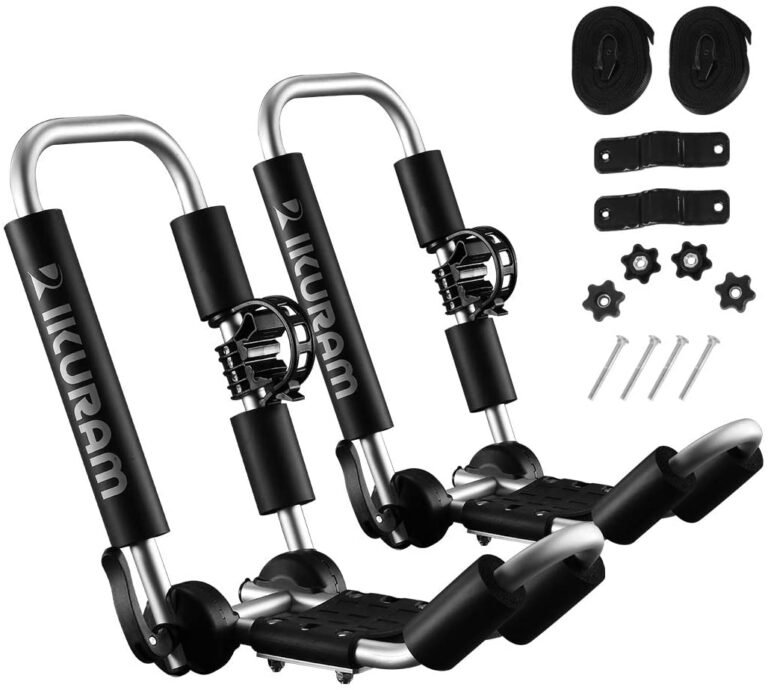
Asegúrese de lanzar siempre su kayak en aguas poco profundas, lejos del tráfico de embarcaciones, para evitar que alguien lo golpee. Asegúrese de que su punto de partida no esté lejos de su vehículo y, si lo está, asegúrese de utilizar un carrito de kayak para hacerte las cosas lo más fáciles posible.
Su punto de partida también debe ser fácilmente accesible para otras personas en el agua para que puedan echarle una mano si necesita ayuda.
Eleva tus piernas mientras remas
Incluso las personas con perfecta salud experimentan rigidez de los músculos cuando mantienen una posición durante un largo período de tiempo y la correspondiente dificultad cuando intentan moverse, por lo que aquellos con malas rodillas pueden esperar una experiencia peor.
Al navegar en kayak, normalmente te sientas y dejas las piernas en su lugar mientras remas. El resultado es que la sangre puede acumularse alrededor de las rodillas, lo que resulta en una experiencia desagradable cuando estás listo para salir del kayak, especialmente si tienes problemas en las rodillas.
Afortunadamente, puedes ahorrarte esta terrible experiencia elevando las piernas mientras remas y evitando que la sangre se acumule alrededor de las rodillas o, al menos, reduciendo la cantidad de sangre que se acumula alrededor de las rodillas.
Puedes elevar tus piernas simplemente colocando una bolsa seca, una mochila u otro artículo suave debajo de tus rodillas mientras remas y lo agradecerás cuando llegue el momento de salir de tu kayak.
No te esfuerces demasiado
Una excelente manera de asegurarse de que todo esté bien al final del día es conocer sus límites y no excederlos. Esto implica regular la distancia que recorres en kayak en cada viaje.
Cuanto mayor sea la distancia que remes, mayor será la tendencia a terminar con las rodillas rígidas al final del día, así que asegúrate de saber lo que estás haciendo.
Si es un ávido kayakista y desarrolló problemas en las rodillas, puede comenzar a medir sus límites navegando en kayak la mitad de la distancia que normalmente haría y seguir superando los límites poco a poco para saber la cantidad de tiempo que puede pasar con seguridad. en el agua y apégate a ella.
Si eres nuevo en el kayak y tienes problemas en las rodillas, te recomendamos navegar con un kayakista experimentado durante un tiempo para que puedas descubrir tus límites en un entorno controlado.
Parte de no esforzarse demasiado es elegir con cuidado el cuerpo de agua en el que navega. Esto puede resultar difícil para algunas personas, especialmente para los kayakistas experimentados que están acostumbrados a navegar por rápidos de aguas bravas.
Si bien no es necesario que renuncie a su pasión por completo, intente ser cauteloso y recuerde que sus problemas de rodilla significan que es posible que no pueda realizar con éxito algunas de las maniobras atrevidas que alguna vez pudo y actuar en consecuencia.
El kayak también se puede disfrutar en aguas tranquilas y no sirve de nada ponerse en riesgo innecesariamente.
No dudes en pedir ayuda
Tener malas rodillas apesta, especialmente cuando empiezas a darte cuenta de que ya no podrás hacer varias cosas con tanta facilidad como antes.
Esto puede resultar abrumador, sobre todo si navegas en kayak en un lugar sin una cara conocida, y mantenerte en secreto, pase lo que pase, puede parecer la opción más segura.
Te digo ahora que tu orgullo no vale tu seguridad. Es muy admirable que no hayas dejado que tus problemas de rodilla se interpongan entre tú y tu deporte favorito.
Así que da el siguiente paso de valentía y pide ayuda cuando la necesites. Si bien es posible que todas las personas que conozca no sean muy amigables, seguramente encontrará a alguien que estará encantado de ayudarlo.
Además, no permitiste que tus rodillas te hicieran abandonar el kayak, entonces, ¿por qué deberías dejar que el orgullo te dominara? Hazte un favor y pide siempre ayuda cuando la necesites.
Cómo entrar en un kayak con malas rodillas
Cómo subirse a un kayak de forma segura es una habilidad que todos los kayakistas deberían dominar, especialmente aquellos con problemas de rodilla. Esto se debe a que no tendrá que preocuparse por salir del kayak si, en primer lugar, no puede subirse a él.
Para que aquellos con problemas de rodilla puedan subirse con seguridad a su embarcación y disfrutar del deporte que aman, a continuación se proporciona una guía paso a paso para subirse a un kayak.
- Encuentre un punto de lanzamiento apropiado en aguas poco profundas. El agua debe llegar hasta las rodillas o la mitad de la longitud del remo.
- Coloque el kayak perpendicular a la orilla o a la costa.
- Vaya a cualquiera de los lados del kayak y párese unos centímetros delante del asiento.
- Ahora coloque una pierna sobre su kayak de modo que quede a horcajadas con un pie en el suelo a cada lado.
- A continuación, deberás mantener el kayak en su lugar para ayudarte a mantener el equilibrio. Puedes hacerlo tú mismo sujetándote de los lados del casco o, mejor aún, puedes pedirle a alguien que sujete el kayak por ti.
- Ahora, dependiendo de en qué lado del kayak estés, puedes bajar al asiento detrás de ti o deslizarte hacia adelante en el asiento del kayak.
- Luego, usas los brazos para levantar las piernas del suelo y colocarlas en el kayak.
- Ahora puedes impulsarte desde la orilla con tu remo y disfrutar de tu aventura.