Cómo transportar un kayak
El kayak es un divertido deporte de remo cuya popularidad se dispara cada día, y con razón. El deporte puede proporcionar euforia y emoción y al mismo tiempo puede realizarse en un ambiente tranquilo.
Es fácil comenzar, es una excelente manera de disfrutar de la naturaleza y proporciona una excelente manera de hacer ejercicio y mantenerse en forma. Sus beneficios continúan, pero como probablemente habrás adivinado, tiene un inconveniente.
Quizás el mayor inconveniente del kayak es que su equipo principal, el kayak, suele ser voluminoso y difícil de transportar.
Me viene a la mente la pregunta de cómo puedes disfrutar del deporte si no puedes llevar tu kayak al agua, y para abordar este problema, se han proporcionado varias soluciones a lo largo de los años.
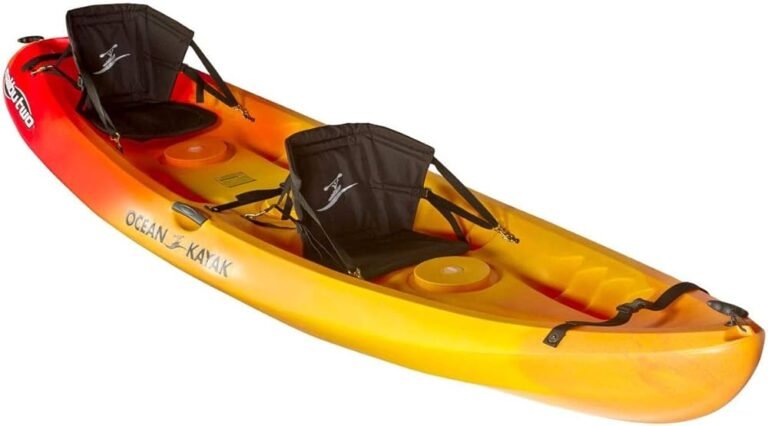
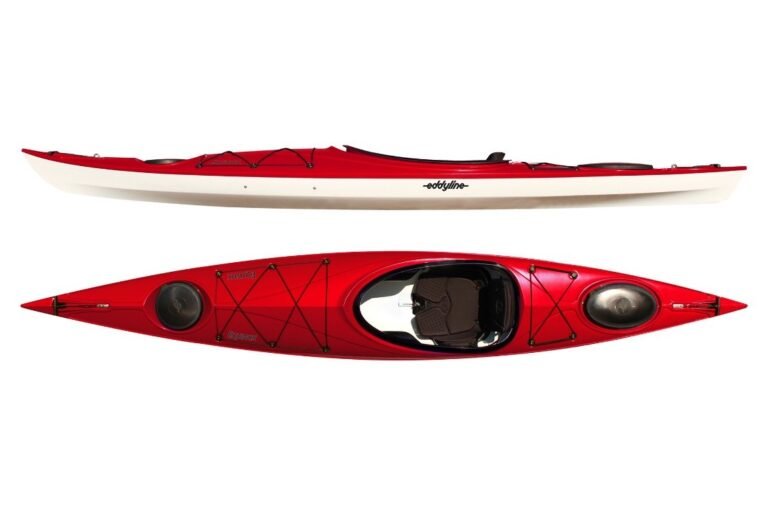
Los kayaks vienen en varias formas y tamaños, y el mejor método para transportarlos puede variar según la persona que transporta la embarcación, los recursos disponibles o el kayak en sí.
En este artículo, maneras fáciles de transporta tu kayak se explican para que tú también puedas llevar tu embarcación al agua y divertirte navegando en kayak.
Cómo transportar un kayak
Llevar su kayak desde donde está hasta el agua o regresar a casa para guardarlo después de remar a su antojo es de suma importancia. A continuación se analizan muchos métodos de transporte en kayak.
Arrastrando el kayak
Si bien esto puede parecer gracioso, la primera forma de llevar su kayak del punto A al punto B es arrastrarlo. Naturalmente, este método de transporte tiene más limitaciones.
- Sólo se puede utilizar en distancias cortas, especialmente con kayaks pesados.
- Sólo debe utilizarse en superficies amigables como césped y arena.
- No es compatible con todos los kayaks. Nunca debes arrastrar kayaks hechos de fibra de vidrio o materiales compuestos. Este método de transporte funciona mejor con kayaks de plástico.
Si debe utilizar este método, asegúrese de doblar las rodillas y levantar las piernas para levantar la proa del kayak del suelo. Mantenga los brazos rectos para que las piernas y los músculos centrales arrastren.
Cómo utilizar un carrito de kayak
Una de las mejores formas de transportar tu kayak sin demasiadas complicaciones es utilizar un kayak. carro o carro. A carrito de kayak Es un marco pequeño y liviano con ruedas que se fijan al casco de su kayak, lo que facilita su desplazamiento de un lugar a otro.
La belleza de este método es que se puede utilizar independientemente de la distancia que pretenda viajar. Si simplemente está moviendo su kayak una distancia corta, simplemente puede cargar el kayak en el carro y luego arrastrarlo hasta su destino, como puede hacer cuando transportar su kayak.
Sin embargo, si va a recorrer un largo camino, deberá acoplar el carrito a su vehículo. El punto de anclaje suele ser el gancho de remolque de su vehículo.
Otra de las ventajas de los carritos para kayak es que, al existir en varios modelos, podrás elegir el que mejor se adapte a tus gustos, al terreno por el que te desplazarás, y además se puede guardar fácilmente.
El tamaño parte de un kayak El carrito es quizás el más importante. Si, después de llegar a su destino, solo necesita recorrer una pequeña distancia hasta el agua, puede guardar rápidamente el carrito en su vehículo, pero si la distancia es significativa, necesitará un carrito que pueda almacenarse en un espacio pequeño.
De esa manera, podrás guardar fácilmente el carro en el almacenamiento de proa o popa de tu kayak sin preocuparte por nada.
También notarás que hacer uso de un carrito para kayak libera espacio en tu vehículo, por lo que podrás llevar tantas cosas como desees y, si así lo deseas, tener el mayor espacio libre posible.
Los carros para kayak son un método de transporte conveniente para aquellos que desean eliminar la necesidad de elevar su kayak a la altura de los hombros, como suele ocurrir cuando cargan un kayak en el techo de un vehículo.
El único inconveniente de los carros para kayak es que cuando se remolcan con un vehículo, efectivamente se duplica la longitud del vehículo, lo que resulta en una reducción en el número de espacios de estacionamiento disponibles para el conductor.
Una consecuencia directa de esto es que es posible que tengas que empacar tu vehículo más lejos del cuerpo de agua donde deseas navegar, especialmente si el lugar es un lugar popular para practicar kayak.
Sin embargo, considerando todo, los beneficios de usar un carrito o carrito para kayak para mover su kayak de un lugar a otro superan con creces las desventajas, así que consiga un carrito para kayak hoy y disfrute del kayak. Créame, es una inversión que vale la pena.
Consejos
Un carrito para kayak es una excelente manera de transportar su kayak de un lugar a otro. Aquí hay algunas cosas a tener en cuenta al usar un carrito para kayak:
- Asegúrese de que el carrito esté lo suficientemente grande para tu kayak. No querrás que sea ni demasiado pequeño ni demasiado grande.
- Asegúrese de que las ruedas estén en buenas condiciones y que estén infladas a la presión adecuada.
- Asegúrate de que los neumáticos del carrito se adapten al terreno en el que jugarás. No querrás que tu carrito se atasque en la arena o el barro.
- Asegúrese de que el carrito tenga una bomba manual para que pueda inflar o desinflar los neumáticos según sea necesario.
- Tenga cuidado al cargar el kayak en el carro. Asegúrese de cargarlo con cuidado para evitar daños al kayak y al carrito.
- Centre el kayak en el carro después de cargarlo.
- Asegúrate de que el kayak esté seguro cuando lo transportes. No querrás que se mueva demasiado y se dañe.
Transporte de un kayak con un vehículo
La forma más habitual de transportar un kayak en la actualidad es mediante el uso de un vehículo. Podría ser un coche pequeño, una camioneta, un todoterreno, etc. Lo importante es llevar el kayak al agua de forma segura independientemente del vehículo que tengas a tu disposición.
Como probablemente sepas, incluso este método tiene variaciones. Generalmente hay tres maneras de transportar un kayak con un vehículo.
- Transporte el kayak en el techo de un vehículo con el uso de una baca.
- Transporte del kayak sobre el techo de un vehículo sin necesidad de utilizar baca.
- Transportar el kayak cargándolo en el maletero del vehículo (normalmente un camión).
Los tres métodos se examinan en detalle a continuación.
1. Transporte del kayak sobre el techo de un vehículo con el uso de una baca.
Una forma de utilizar su vehículo para llevar su kayak de un lugar a otro es utilizar una baca para kayak.
El soporte actúa como soporte para el kayak, proporcionando una plataforma estable para asegurar el kayak y al mismo tiempo protege el techo de su vehículo para que no dañe el kayak. Si bien el estante puede ser costoso, es un hecho innegable que valdrá la pena.
¿Qué es un ¿Portaequipajes para kayak?
Una baca para kayak es un sistema de correas y/o barras instaladas en el techo de un vehículo que permite transportar uno o más kayaks. Las bacas para kayak son un equipo esencial para cualquiera que quiera transportar su(s) kayak(s) en coche.
Algunas bacas de techo para kayak están diseñadas para usarse con vehículos específicos, mientras que otras se pueden usar con cualquier vehículo.
Hay muchos tipos y diseños diferentes de portaequipajes para kayak, y el mejor tipo para usted dependerá de sus necesidades y preferencias individuales. Las bacas para kayak se pueden comprar en la mayoría de las tiendas de artículos deportivos o en línea.
Lo que necesitarás
Para exitosamente transporta tu kayak En el techo de su vehículo con el uso de un portakayaks, necesitará algunos accesorios, a saber:
Estante para kayaks
Junto al vehículo, este es el accesorio más importante para este medio de transporte. Después de todo, el soporte para kayak es donde el kayak pasará todo el viaje. Antes de adquirir una baca, primero debe asegurarse de que su vehículo pueda equiparse con una.
Generalmente, para que un vehículo esté equipado con una baca, ya debe tener barras transversales sobre las que se apoyará la baca. También se debe considerar la compatibilidad tanto con el techo del vehículo como con el/los kayak(s) a transportar antes de adquirir la baca.
Después de asegurarte de tener el portaequipajes adecuado, debes montarlo en tu vehículo. La instalación de la baca debe realizarse con cuidado y según las instrucciones del fabricante.
Si no eres muy hábil en estas cosas, siempre puedes conseguir a alguien que te ayude. La instalación debe ser impecable para evitar problemas futuros.
Correas/cordones elásticos
La función de las correas y las cuerdas elásticas es garantizar que su kayak permanezca en su sitio durante todo el viaje. Algunas bacas de techo vienen con correas, pero si la suya no las incluye, siempre puede conseguir cuerdas elásticas o correas para ayudar a asegurar su kayak.
Las correas son bastante fáciles de asegurar, por lo que es recomendable usarlas, pero también puedes usar cuerdas elásticas. Si utiliza cuerdas elásticas, debe tener cuidado para evitar que se enreden y también asegurarse de saber cómo hacer nudos seguros.
No dañaría su kayak y posiblemente provocaría un accidente debido a un nudo.
Relleno
Puede ser cualquier material blando que pueda colocar en el soporte del kayak antes de cargar el kayak en él. Funciona como un cojín que soporta la peor parte del peso del kayak, asegurando que su kayak, la baca o el vehículo sufran el menor daño posible. Algunas bacas de techo vienen con acolchado incorporado, por lo que es posible que no las necesites.
Lona alquitranada
Utiliza lonas para proteger el kayak de los elementos después de asegurarlo a la baca. Si bien la lona no es un accesorio necesario, ciertamente es útil para el mantenimiento de su kayak.
Procedimiento
- Instale el soporte para kayak. El portaequipajes debe instalarse en el techo del vehículo según el manual de instrucciones. Recuerde adquirir un kayak que se adapte tanto a su kayak como a su techo, y todo irá bien. Vuelva a verificar su trabajo cuando haya terminado para asegurarse de que nada esté comprometido.
- Lo siguiente que debes hacer es cargar el kayak en la baca. Esto es bastante fácil si tienes un dispositivo de elevación cerca, pero si no, siempre puedes hacerlo tú mismo. Asegúrese de que haya un acolchado entre el kayak y la baca para protegerlos a ambos de daños. También tenga cuidado al cargar el kayak en el techo para evitar que se caiga sobre la baca, el suelo o algo peor. En este artículo se hablará más sobre cómo cargar un kayak en el vehículo.
- Una vez que hayas colocado el kayak en la baca, puedes proceder a asegurarlo con correas o cuerdas elásticas. El método que utilice para asegurar depende de su preferencia, pero cualquiera que sea el método que elija, asegúrese de que el kayak no se pueda mover cuando haya terminado. Sin embargo, debes tener cuidado en esta etapa, ya que apretar demasiado el kayak puede dañarlo, así que hazlo todo con moderación. Además, asegúrate de asegurar la proa y la popa del kayak.
- Si así lo deseas, puedes utilizar una lona para proteger el kayak de los elementos. Este paso no es obligatorio.
- Una vez que todo esté configurado, todo lo que queda es volver a verificar su trabajo y luego conducir hasta su destino. Naturalmente, debes cumplir con todas las normas de tráfico y las leyes de transporte de kayak en todas las áreas por las que viajarás. Conduce con precaución y llegarás a tu destino en poco tiempo disfrutando de tu aventura en kayak.
2. Transporte del kayak sobre el techo de un vehículo sin el uso de una baca.
Cuando llevas un kayak en un viaje por carretera, la forma más sencilla de transportarlo es fijándolo al techo del vehículo. Esto se puede hacer sin baca utilizando algunos materiales básicos que se pueden encontrar en cualquier ferretería.
Con un poco de creatividad, el kayak se puede fijar de forma segura al techo y transportar sin problemas.
Lo que necesitarás
Como este método es muy similar a cuando se utiliza una baca, prácticamente se necesitan las mismas cosas.
- Correas o cuerdas elásticas: Para sujetar el kayak al techo del vehículo.
- Acolchado: Para reducir los daños que el kayak pueda causar en el techo del vehículo.
- Lona: Para proteger el kayak de la ira de los elementos. Como se mencionó anteriormente, es opcional, pero si viajará en un clima adverso, es aconsejable utilizar uno.
- Postes: Pueden ser palos cortos y resistentes colocados estratégicamente en el techo del vehículo para proporcionar puntos de anclaje para asegurar el kayak. Tenga en cuenta que el uso de postes como puntos de anclaje no es necesario.
Procedimiento
- Si utiliza postes para el anclaje, deberá fijarlos al techo del vehículo. Debe haber al menos 4 de ellos colocados en cada esquina del vehículo, pero normalmente puedes utilizar seis postes. Los postes deben ser lo suficientemente altos como para servir como límites para los kayaks cargados. También tenga en cuenta que si utiliza bastones, sus opciones para cargar el kayak en el vehículo serán limitadas. Por ejemplo, es posible que no puedas cargar los kayaks desde un costado.
- Independientemente de si utilizas postes o no, el siguiente paso debe ser colocar un acolchado en el techo del vehículo. No se debe pasar por alto el acolchado si no se quiere que el vehículo desarrolle otros problemas.
- Una vez que todo esté listo, debes cargar tu kayak en el techo del vehículo. Hágalo de manera eficiente y con cuidado.
- A continuación, aseguras el kayak al techo del vehículo. Puedes hacer uso de correas o cuerdas elásticas; con lo que te sientas más cómodo. entonces deberías cubrir el kayak con una lona para mayor protección.
- Conduce con seguridad a tu destino.
3. Transporte del kayak cargándolo en el maletero del vehículo (normalmente un camión).
El último método de transporte en vehículo es simplemente cargar el kayak en el maletero del vehículo (o en la plataforma del camión), asegurarse de que el kayak permanezca en su sitio y luego conducir hasta su destino.
Este método sólo es posible cuando tienes un vehículo que puede acomodar al menos dos tercios de la longitud del kayak en su baúl (cama), por eso es bastante popular entre quienes usan camiones.
En este método, puedes utilizar un kayac portaequipajes solo si la plataforma del camión puede acomodar toda la longitud del kayak.
Todo lo que tienes que hacer es instalar el Porta kayak a la caja del camión., cargue el kayak en el soporte para kayak, luego asegúrelo y listo.
Tenga en cuenta que, si bien el estante no es una necesidad, proporciona una manera fácil de asegurar el kayak en la plataforma del camión.
Si no puede utilizar un estante, siempre puede cargar el kayak en diagonal en la plataforma del camión (si cabe de esa manera) antes de asegurarlo con correas o cuerdas elásticas.
Debes tener cuidado si deseas tomar esta ruta ya que cualquier error durante la carga podría provocar que tu kayak se atasque.
Asegúrese de utilizar correas o cuerdas elásticas para asegurar el kayak de forma adecuada y evitar que se mueva, se atasque o se dañe.
La última modificación de este método es aquella en la que parte del kayak se carga en la plataforma del camión mientras que la otra descansa sobre la puerta trasera elevada del camión. En este método, la mayor parte del kayak ya debería estar en la plataforma del camión y solo una pequeña parte descansa sobre la puerta trasera.
Además, deberás atar una tela de colores brillantes al extremo del kayak para que actúe como sistema de alerta a quienes se encuentren en los alrededores para ayudar a prevenir accidentes.
NB: Para seguridad transportar un kayak en la caja de un camión, debe tener menos de 13 pies de largo.
Conducir su kayak hasta su destino
Después de elegir el método de transporte de un kayak que más le convenga y asegurarlo con éxito, deberá conducir hasta su destino, que suele ser el lugar de inicio de su aventura de remo.
En este momento, debes asegurarte de que nada salga mal para que tus esfuerzos no sean en vano. Asegúrese de obedecer todas las normas de tránsito y las reglas de transporte de kayak a lo largo de su ruta de viaje.
Para un viaje más tranquilo y agradable, debe trazar su ruta de viaje de antemano y elegir un momento en el que haya poco tráfico para continuar su camino.
Además, hacer paradas periódicas para asegurarse de que todas las revisiones estén bien y que su kayak no corra peligro de dañarse o causar un accidente, es un curso de acción inteligente. Descubrirá que conduciendo de forma eficiente y responsable podrá llegar a su destino con pocos o ningún problema.
Una vez en el sitio de lanzamiento, cumpla con su horario. Quizás quieras tomar un pequeño descanso antes de lanzarte al agua o, si estás lleno de energía, puedes comenzar tu aventura de remo de inmediato.
Cómo llevar un kayak tú solo
Cargar un kayak en el techo de un vehículo a menudo implica levantar la embarcación hasta la altura de los hombros (si no tienes una ayuda para levantar el kayak).
Saber cómo hacerlo de manera eficiente sin lastimarse es, por lo tanto, un conocimiento muy valioso para todos los kayakistas. El proceso se explica a continuación.
- Coloca la proa del kayak en la dirección que deseas desplazar después de levantarlo. El kayak debe colocarse horizontalmente frente a usted, con usted de pie hacia el centro del kayak. Si el arco mira hacia la derecha, estarás llevando el kayak en tu hombro izquierdo y viceversa.
- Luego, doble las rodillas y agáchese. Luego debes agarrar el borde de la cabina más cercana a ti y levantar el kayak hasta tus muslos. Esto significa subir gradualmente hasta que el kayak acabe sobre tus muslos. Recuerda mantener las rodillas dobladas y la espalda recta. De esa manera, tus piernas soportan la mayor parte del peso del kayak con poca tensión en el resto del cuerpo. Debes tener en cuenta que una vez que el kayak esté a la altura de los muslos, debe ser lo suficientemente alto como para cargarlo en la mayoría de los carros de kayak y dispositivos de elevación de kayak. Si nuestro carro o dispositivo de elevación es más alto que esa altura, deberías poder alcanzar la altura deseada levantando el kayak un poco más. La altura del muslo también debería ser suficiente para cargar el kayak en la plataforma de un camión y, si no lo es, un poco de elevación de su parte debería ser suficiente.
- El último y más difícil paso implica rodando el kayak hasta tu hombro. Para ejecutarlo, mientras mantienes las rodillas dobladas y la espalda recta, alcanza el borde al otro lado de la cabina y agárralo de manera que la cabina ahora mire hacia ti. Luego debes levantar el kayak mientras estás de pie y girarlo sobre tus hombros de modo que el borde descanse sobre tu hombro.
- Después de asegurarse de que todo esté equilibrado y de ser consciente de su entorno, muévase y cargue el kayak en el techo del vehículo.
NÓTESE BIEN: La práctica hace la perfección, así que practica levantar tu kayak por tu cuenta en condiciones controladas. Si hacer rodar el kayak parece imposible en el paso 2, devuélvalo suavemente al suelo, tómate un descanso y vuelve a intentarlo. Al final lo conseguirás.
Uno de los mayores dolores del kayak es mover la pieza principal del equipo, el kayak, de un lugar a otro. Afortunadamente, esta tarea se ha vuelto mucho más fácil gracias a la tecnología moderna.
Cuando mueva su kayak una distancia corta, puede arrastrarlo si las condiciones son adecuadas o levantarlo hasta la altura de los hombros y luego llevarlo a su destino.
Si tienes un compañero cerca, mover el kayak se vuelve más fácil ya que cada uno puede agarrar un asa en la proa y la popa del kayak para llevarlo a donde desee. Puedes mover dos kayaks al mismo tiempo aplicando este método.
Sin embargo, cuando tienes que recorrer una distancia considerable, necesitas medios de transporte que te cuesten considerablemente menos en energía.
Una solución sencilla es utilizar un carrito para kayak para mover fácilmente su kayak a distancias grandes y pequeñas. Si por lo que sea, un carrito no te apetece, siempre podrás transportar tu kayak con tu vehículo.
Esto se puede lograr cargando el kayak en su vehículo con o sin el uso de un soporte para kayak o cargando el kayak en la plataforma de su camión. Cualquiera que sea el método que elija, asegúrese de que sea seguro y legal, y de que no tenga nada que temer. ¡Diviértete en el agua!