How To Transport A Kayak
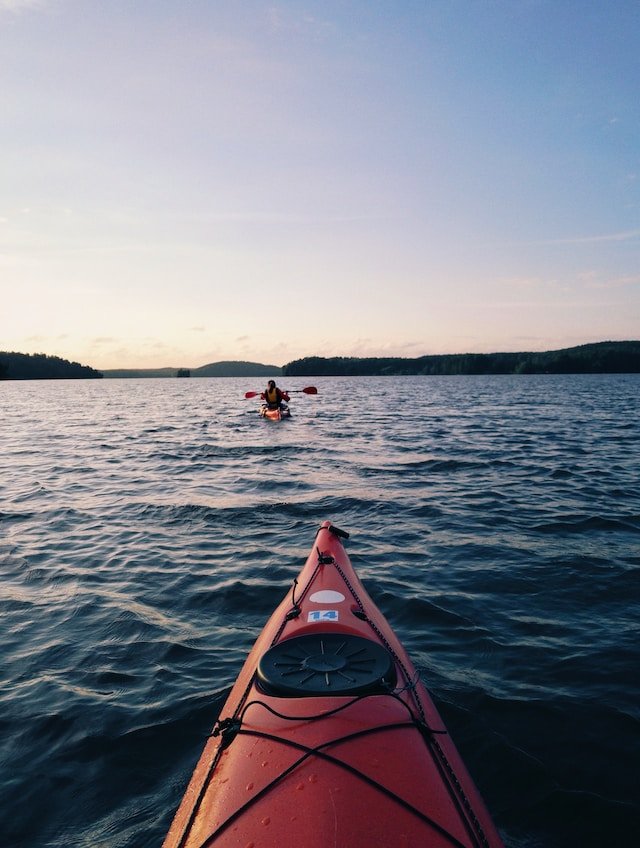
Kayaking is a fun paddle sport whose popularity skyrockets every day, and for good reason. The sport can provide exhilaration and excitement while also being able to be performed in a calm environment.
It is easy to get started, is an excellent way to enjoy nature, and provides a great way to work out and stay in shape. Its benefits continue, but as you’ve probably guessed, it has a catch.
Perhaps the greatest drawback of kayaking is that its main piece of equipment, the kayak, is often bulky and can be difficult to transport.
The question of how you can enjoy the sport if you can’t get your kayak to the water comes to mind, and to tackle this problem, several solutions have been provided over the years.
Kayaks come in various shapes and sizes, and the best method to transport them can vary depending on the individual transporting the watercraft, the resources available, or the kayak itself.
In this article, easy ways to transport your kayak are explained so you too can get your vessel to the water and have fun kayaking.
How To Transport A Kayak
Getting your kayak from where it is to the water or back home for storage after paddling to your heart’s content is of utmost importance. Many methods of kayak transportation are discussed below.
Dragging the Kayak
While this may seem hilarious, the first way to get your kayak from point A to point B is to drag it. This method of transport naturally has the most limitations.
- It can only be used over a short distance, especially with heavy kayaks.
- It should only be employed on friendly surfaces like grass and sand.
- It is not friendly to all kayaks. You must never drag kayaks made of fiberglass or composite materials. This transport method works best with plastic kayaks.
If you must use this method, make sure you are bending your knees and lifting with your legs to raise the bow of the kayak off the ground. Keep your arms straight so that your legs and core muscles do the dragging.
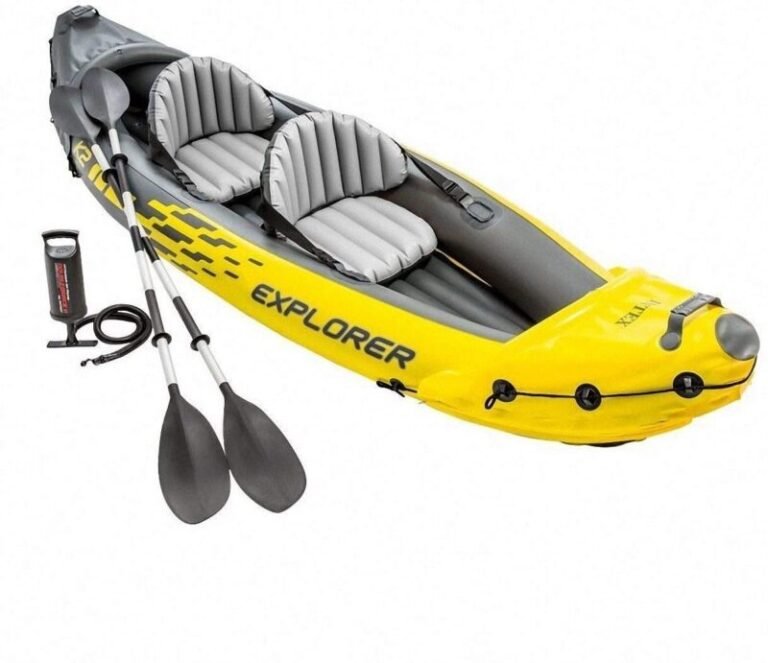
Making Use Of A Kayak Cart
One of the best ways to transport your kayak without too much hassle is to make use of a kayak cart or trolley. A kayak cart is a small, lightweight frame with wheels that attach to the hull of your kayak, making it easy to roll from place to place.
The beauty of this method is that it can be used regardless of the distance you intend to travel. If you are simply moving your kayak a short distance, you can simply load the kayak on the cart and then tug it to your destination, as you may do when portaging your kayak.
If you will be going a long way, however, you will have to attach the cart to your vehicle. The anchoring point is often the tow hook of your vehicle.
One other benefit of kayak carts is that, as they come in several models, you can get the one best suited to your tastes, the terrain you will be moving on, while still being easily stored.
The size part of a kayak cart is perhaps the most important. If, after reaching your destination, you need only travel a small distance to the water, you can quickly store the cart in your vehicle, but if the distance is significant, you will need a cart that can be stored in a small space.
That way, you can easily store the cart in the bow or stern storage of your kayak without worrying about anything.
You will also notice that making use of a kayak cart frees up space in your vehicle, so you can bring as many things as you desire and, if you so desire, have as much free space as possible.
Kayak carts are a convenient transportation method for those who want to eliminate the need to raise their kayak to shoulder height, as is often the case when loading a kayak onto the roof of a vehicle.
The only drawback to kayak carts is that when towing one with a vehicle, it effectively doubles the length of the vehicle, resulting in a reduction in the number of parking spaces available to the driver.
A direct consequence of this is that you may have to pack your vehicle further away from the waterbody where you intend to kayak, especially if the place is a popular kayaking spot.
All things considered, however, the benefits of using a kayak cart or trolley to move your kayak from one place to the other far outweigh the cons, so get yourself a kayak cart today and enjoy kayaking. Trust me, it’s a worthwhile investment.
Tips
A kayak cart is a great way to transport your kayak from place to place. Here are a few things to keep in mind when using a kayak cart:
- Make sure the cart is big enough for your kayak. You don’t want it to be too small or too big.
- Make sure the wheels are in good condition and that they are inflated to the proper pressure.
- Ensure that the tires of the cart are suited to the terrain you will be playing. You don’t want your cart to get stuck in sand or mud.
- Make sure the cart has a hand pump so you can inflate or deflate the tires as needed.
- Be careful when loading the kayak onto the cart. Make sure you load it with care to prevent damage to the kayak and cart.
- Center the kayak on the cart after loading it.
- Make sure the kayak is secure when you are transporting it. You don’t want it to move around too much and get damaged.
Transporting A Kayak With A Vehicle
The most common way of transporting a kayak today is with the use of a vehicle. It could be a small car, a truck, a SUV, etc. The important thing is safely getting the kayak to the water regardless of the vehicle at your disposal.
As you probably know, even this method comes with variations. Generally, there are three ways to transport a kayak with a vehicle.
- Transporting the kayak on the roof of a vehicle with the use of a roof rack.
- Transporting the kayak on the roof of a vehicle without the use of a roof rack.
- Transporting the kayak by loading it in the trunk of the vehicle (usually a truck).
All three methods are examined in detail below.
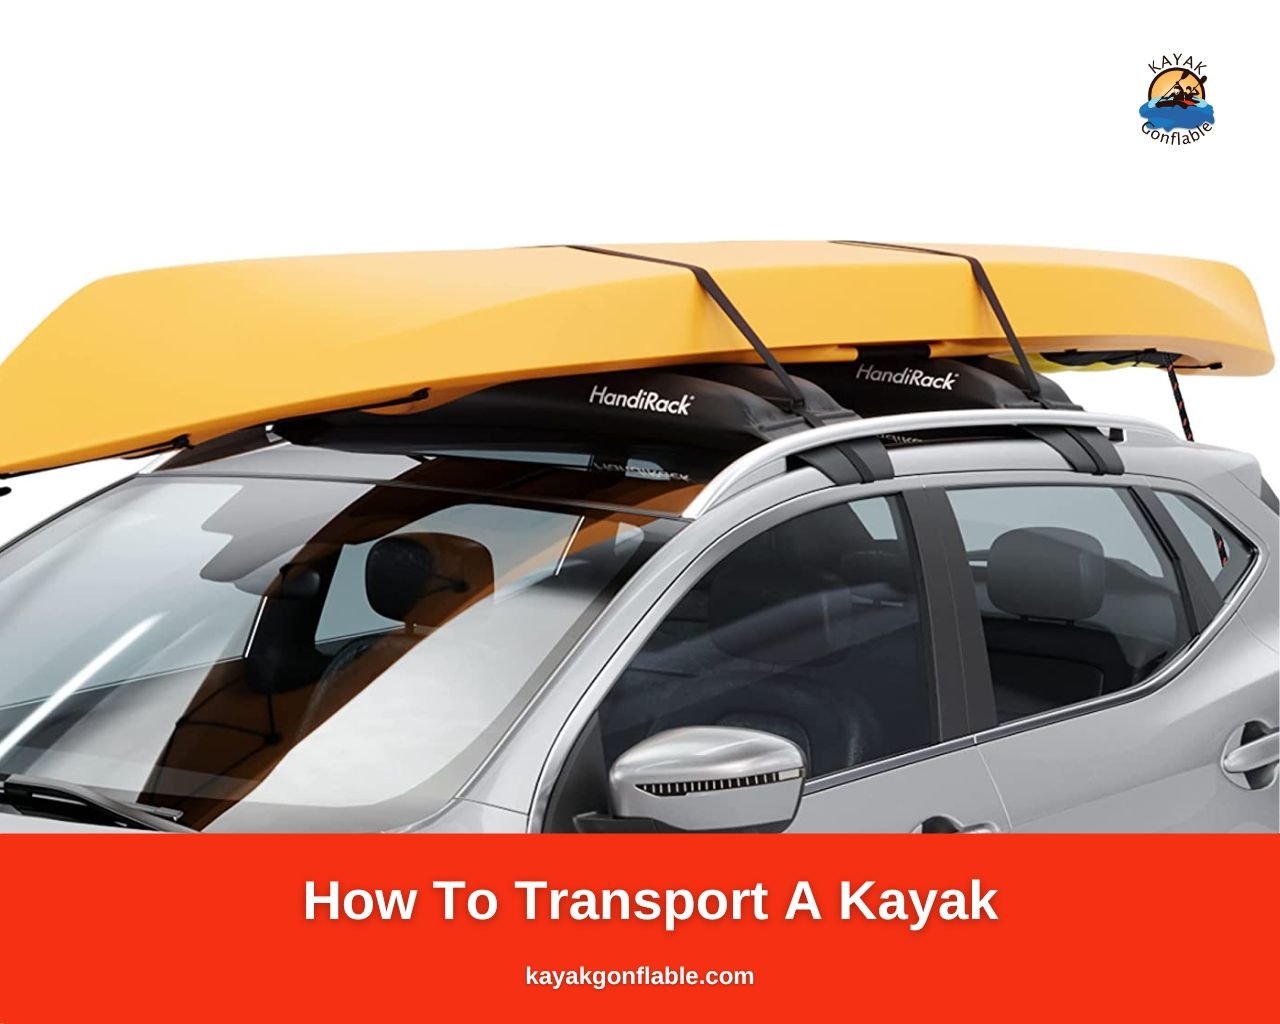
1. Transporting The Kayak On The Roof Of A Vehicle With The Use Of A Roof Rack.
One way to use your vehicle to get your kayak from place to place is to make use of a kayak roof rack.
The rack acts as a support for the kayak, providing a stable platform for you to secure the kayak while protecting the roof of your vehicle from being damaged by the kayak. While the rack may be pricey, it is an undeniable fact that it will be worth it.
What Is A Kayak Roof Rack?
A kayak roof rack is a system of straps and/or bars installed on the roof of a vehicle that enables it to carry one or more kayaks. Kayak roof racks are an essential piece of equipment for anyone who wants to transport their kayak(s) by car.
Some kayak roof racks are designed to be used with specific vehicles, while others can be used with any vehicle.
There are many different types and designs of kayak roof racks, and the best type for you will depend on your individual needs and preferences. Kayak roof racks can be purchased at most sporting goods stores or online.
What You’ll Need
To successfully transport your kayak on the roof of your vehicle with the use of a kayak rack, you will need some accessories, namely:
Kayak Rack
Next to the vehicle, this is the most important accessory for this method of transport. The kayak rack is, after all, where the kayak will spend the entirety of the journey. Before procuring a roof rack, you first have to ensure your vehicle can be outfitted with one.
Generally, for a vehicle to be outfitted with a roof rack, it has to already possess crossbars that the rack will rest upon. Compatibility with both the vehicle’s roof and the kayak(s) to be transported should also be considered before purchasing the roof rack.
After making sure you have the right rack, you should mount it on your vehicle. Installation of the roof rack should be done with care and according to the manufacturer’s instructions.
If you are not quite handy at such things, you can always get someone who is to help you with it. The installation must be flawless to prevent future problems.
Straps/Bungee Cords
The role of straps and bungee cords is to make sure your kayak stays put throughout your journey. Some roof racks come with straps, but if yours does not, you can always get either bungee cords or straps to help secure your kayak.
Straps are quite easy to secure, so using them is advisable, but you can also use bungee cords. If you make use of bungee cords, you have to watch out to keep them from tangling and also make sure you know how to tie secure knots.
It wouldn’t do to damage your kayak and possibly cause an accident because of a knot.
Padding
This can be any soft material that you can place on the kayak rack before loading the kayak onto it. It functions like a cushion that takes the brunt of the kayak’s weight, ensuring as little damage as possible is sustained by your kayak, the roof rack, or the vehicle. Some roof racks come with inbuilt padding, so you may not need one.
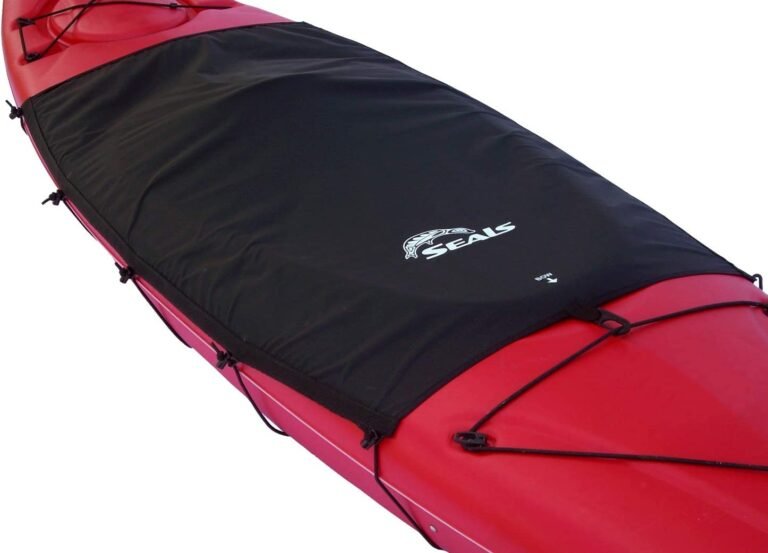
Tarpaulin
You use tarps to protect the kayak from the elements after securing it to the roof rack. While tarpaulin is not a necessary accessory, it certainly is useful in maintaining your kayak.
Procedure
- Install the kayak rack. The rack should be installed on the vehicle’s roof as per the instruction manual. Remember to procure a kayak suited to both your kayak and roof ,and all will be well. Double-check your work when you are done to ensure nothing is compromised.
- The next thing to do is to load the kayak to the roof rack. This is quite easy if you have a lifting device close by, but if not, you can always do it yourself. Make sure there is padding between the kayak and the roof rack to protect both of them from damage. Also take care when loading the kayak onto the roof to avoid dropping it on either the roof rack, the ground, or worse yourself. More will be said on loading a kayak onto the vehicle in this article.
- Once you’ve positioned the kayak on the roof rack, you can proceed to secure it with straps or bungee cords. The method you use when securing depends on your preference but whichever method you choose, make sure the kayak can’t move when you are through. You should however be careful at this stage as overtightening the kayak can damage it so do everything with moderation. Also, make sure you secure the bow and the stern of the kayak.
- If you so desire, you can make use of a tarpaulin to protect the kayak from the elements. This step is not mandatory.
- Once all is set, all that is left is to double-check your work, and then drive to your destination. Naturally, you should adhere to all traffic regulations and kayak transportation laws in all the areas you will be traveling through. Drive cautiously and you will be at your destination in no time enjoying your kayaking adventure.
2. Transporting The Kayak On The Roof Of A Vehicle Without The Use Of A Roof Rack.
When bringing a kayak along on a road trip, the easiest way to transport it is by attaching it to the roof of the vehicle. This can be done without a roof rack by using some basic materials that can be found at any hardware store.
With a little bit of creativity, the kayak can be securely attached to the roof and transported without any issues.
What You’ll Need
As this method is very similar to when you are using a roof rack, you virtually require the same things.
- Straps or bungee cords: To secure the kayak to the vehicle’s roof.
- Padding: To reduce any damage the kayak may cause to the vehicle roof.
- Tarpaulin: To protect the kayak from the wrath of the elements. As aforementioned, it is optional but if you will be traveling in unfriendly weather, it is wise to use one.
- Poles: These can be short sturdy sticks strategically placed on the roof of the vehicle to provide anchoring points for securing the kayak. Keep in mind that the use of poles for anchoring points is not a necessity.
Procedure
- If you are making use of poles for anchorage, you will need to fit them to the vehicle’s roof. There should be at least 4 of them placed at each corner of the vehicle, but typically you can make use of six poles. The poles should be tall enough to serve as boundaries for the loaded kayak(s). Also note that if you are making use of poles, your options for loading the kayak to the vehicle will be limited. For instance, you may not be able to load the kayak(s) from the side.
- Regardless of whether or not you use poles, the next step should be placing padding on the vehicle’s roof. The padding must not be overlooked if you don’t want the vehicle to develop other problems.
- Once all is set, you should load your kayak to the vehicle’s roof. Do so efficiently and with care.
- Next, you secure the kayak to the vehicle roof. You can make use of straps or bungee cords; whichever you feel most comfortable with. You should then cover the kayak with a tarp for extra protection.
- Drive safely to your destination.
3. Transporting The Kayak By Loading It In The Trunk Of The Vehicle (Usually A Truck).
The final method of transportation by vehicle is simply loading the kayak onto the trunk of the vehicle (or the bed of the truck), making sure the kayak stays put, and then driving to your destination.
This method is only possible when you have a vehicle that can accommodate at least two-thirds of the kayak’s length in its trunk (bed), that is why it is quite popular with those using trucks.
In this method, you can use a kayak rack only if the bed of the truck can accommodate the entire length of the kayak.
All you have to do is install the kayak rack to the bed of the truck, load the kayak to the kayak rack, then secure it and you are good to go.
Keep in mind that while the rack is not a necessity, it provides an easy way to secure the kayak in the bed of the truck.
If you can’t make use of a rack, you can always load the kayak diagonally in the bed of the truck (if it will fit that way) before securing it with straps or bungee cords.
You should be cautious if you wish to take this route as any mistake while loading could result in your kayak getting stuck.
Be sure to use straps or bungee cords to secure the kayak appropriately to stop it from moving and getting stuck or damaged.
The last alteration of this method is one in which part of the kayak is loaded in the bed of the truck while the other rests on the raised tailgate of the truck. In this method, most of the kayak should already be in the truck’s bed with only a small portion resting on the tailgate.
Furthermore, you are to tie a brightly colored cloth to the end of the kayak to act as an alert system to those in the surroundings to help prevent accidents.
NB: To safely transport a kayak in the bed of a truck, it must be less than 13 feet in length.
Driving Your Kayak To Your Destination
After picking whatever method of transporting a kayak that suits you and successfully securing your kayak, you are to drive to your destination which is typically the launch site of your paddling adventure.
At this juncture, you want to make sure nothing goes askew so your efforts are not in vain. Make sure you obey all traffic regulations and kayak transportation rules along your travel route.
For a smoother and more enjoyable trip, you should map out your journey route beforehand and pick a time when the traffic is light to be on your way.
Also, making periodic stops to make sure all checks out and your kayak is in no danger of getting damaged or worse causing an accident, is a wise course of action. You will find that by driving efficiently and responsibly, you will be able to get to your destination with little or no hassle.
Once at your launch site, stick to your schedule. You may want to take a little break before hitting the water, or if you are full of energy, you can start your paddling adventure immediately.
How To Carry A Kayak By Yourself
Loading a kayak onto a vehicle’s roof often entails lifting the watercraft to shoulder height (if you don’t have a kayak lifting aid).
Knowing how to do so efficiently without injuring yourself is thus very valuable knowledge to all kayakers. The process is explained below.
- Position the bow of the kayak in the direction you intend to travel after lifting it. The kayak should be positioned horizontally in front of you with you standing towards the center of the kayak. If the bow is facing the right, you will be carrying the kayak on your left shoulder and vice versa.
- Next, bend your knees and squat down. You should then grab the rim of the cockpit closest to you and lift the kayak to your thighs. This means rising gradually till the kayak ends up on your thighs. Remember to keep your knees bent and your back straight. That way, your legs bear most of the kayak’s weight with little strain on the rest of your body. You should bear in mind that once the kayak is at thigh height, it should be high enough to load onto most kayak carts and kayak lifting devices. If our cart or lifting device is taller than that height, you should be able to reach the desired height by lifting the kayak a little higher. The thigh height should also be enough to load the kayak to the bed of a truck, and if it isn’t, a little lifting on your part should do the trick.
- The last and most difficult step involves rolling the kayak up to your shoulder. To execute it, while keeping your knees bent and your back straight, reach the rim on the other side of the cockpit and grab it such that the cockpit now faces you. You should then lift the kayak as you stand and roll it onto your shoulders such that the rim rests on your shoulder.
- After ensuring all is balanced and being aware of your surroundings, move then load the kayak to the vehicle’s roof.
NB: Practice makes perfect, so practice lifting your kayak on your own in controlled conditions. If rolling the kayak seems impossible at step 2, return the kayak gently to the ground, give yourself a break then try again. You will get it eventually.
One of the greatest pains of kayaking is moving the main piece of equipment, the kayak, from one place to the other. Fortunately, this task is made considerably easier thanks to modern technology.
When moving your kayak a short distance, you can either drag it if the conditions are right or lift it to shoulder height, then carry it to your destination.
If you have a partner around, moving the kayak becomes easier as you can each grab a handle at the bow and stern of the kayak to carry it wherever you wish. You can move two kayaks at the same time by applying this method.
When you have to travel a considerable distance, however, you need transportation means that will cost you considerably less in energy.
An easy solution is making use of a kayak cart to easily move your kayak across distances both great and small. If for whatever reason, a cart does not appeal to you, you can always transport your kayak with your vehicle.
This can be accomplished by loading the kayak to your vehicle with or without the use of a kayak rack or loading the kayak in the bed of your truck. Whichever method you choose, make sure it is safe and legal, and you have nothing to fear. Have a fun time on the water!