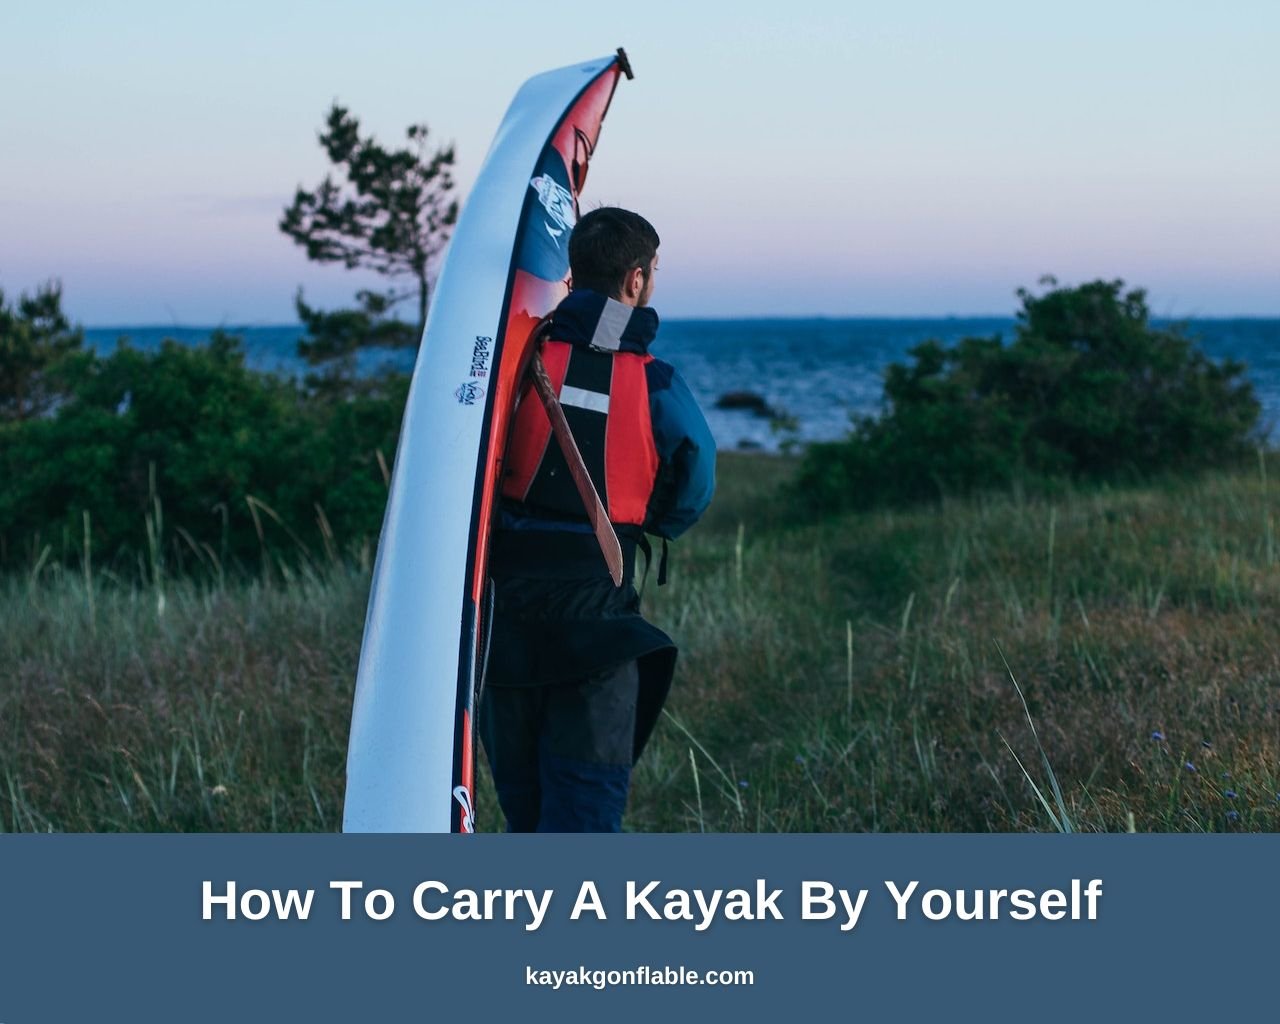
How To Carry A Kayak By Yourself
Kayaking is a fun paddle sport whose popularity has been skyrocketing in recent years. As the sport becomes more popular, more and more people find their way to the water looking for a fun, relaxing, and sometimes exhilarating time on the water.
Whether you own the kayak you use or borrow, there is one obstacle that usually stands between you and your kayaking adventure, and that is transporting the kayak.
You can only have fun paddling if the kayak is in the water, and more often than not, you have to take the kayak a long way before being able to embark on your paddling adventure.
Several ways of transporting kayaks from one place to another exist, but one thing common to them all is carrying the kayak.
Regardless of whether you are using a car, truck, or kayak cart, you have to lift the kayak some distance above the ground before loading it on the transport mechanism, and it can be dangerous if you lack the know-how.
Due to kayaks’ weight and shape, carrying them requires some knowledge and safety consciousness if your trip will not be cut short because you got injured carrying your kayak or damaged the vessel. All you need to know to lift and carry a kayak by yourself is given in this article.
What To Know Before Trying To Lift A Kayak
Transporting kayaks is an integral, though not much fun, part of a kayaker’s life, especially if he loves kayaking in new waterbodies to broaden his horizons.
Several ways to get kayaks from point A to B exist to make the task as simple as possible, though they all come with some risks like the danger of injuries.
The task of carrying a kayak is generally made easier when you have more people to help or your kayak is designed to address those issues, but you can’t always have someone to help.
The first thing to note before attempting to lift a kayak is its weight. This might seem trivial at first, but you will notice it becomes very important, especially when you have to lift the kayak to shoulder height before loading it onto the vehicle.
Depending on the weight of your kayak, lifting it alone may not be advisable for safety reasons, and you are better off getting a kayak lift assist product to bail you out of trouble.
If you don’t have a lifting device at hand and own a particularly heavy kayak, you should ask someone around to give you a hand in lifting the yak off the ground.
Be sure to explain what is required of them if they are already kayakers, and you should be fine. Even after accounting for the weight, there could still be injuries if you do not account for the kayak’s length. This is especially true if you are carrying a kayak on your shoulder in a crowded place and have to turn.
Any slight mistake could result in you seriously wounding anyone unfortunate enough to be in the vicinity or serious damage to both your kayak and whichever object you hit.
Yet another thing to consider is your height and the height to which you will be loading the kayak. If you are quite tall, then lifting the kayak to your shoulder should be high enough to load it onto most vehicles, but that is not always the case.
The height to which you will be loading the kayak is crucial because the heavier the kayak, the harder it will be to lift. If you live alone or don’t have anyone handy to help with lifting your kayak, particularly if you own a tall vehicle, consider investing in kayak lift assist devices as those typically require you to lift the kayak to waist height sparing you the effort of lifting the kayak any higher.
Easy Ways To Transport A Kayak
Mankind naturally loves the less straining path, and if you don’t already own a kayak, you might find yourself thinking, “Is it possible to get a kayak that suits my needs and is also easy to transport?”
If you are in this category, worry no more as the answer to your problem is yes, there are ways to ease this tiresome burden. The first solution is to opt for a lightweight kayak.
The weight of the yak is by far the most dangerous criterion as the higher the kayak is when it falls, the greater the chance of potential injury to those in its vicinity and also the greater the chance of the kayak getting damaged.
Owning a sturdy lightweight kayak eliminates the weight issue and allows you to easily carry your kayak from one place to the other.
In the interest of packing light, another solution is to opt for an inflatable kayak. These yaks are the easiest to transport as they can be simply deflated, then stored in a backpack and tossed in the car trunk.
They also come with the benefit of eliminating the issue of storing your kayak. The next easy route is to eliminate the carrying and lifting altogether.
As you may have guessed, it is the most limited of the methods as first it is best implemented on plastic kayaks and should not be attempted on light yaks like fiberglass or composite kayaks.
This option involves dragging the kayak to your intended destination. It should, however, only be employed on grassy or sandy terrain as other terrains would be hostile to the kayak potentially damaging its hull and keel.
The use of kayak carts can also make transporting kayaks easier, especially over long distances.
The catch here is to first make sure the kayak cart can handle the weight being applied to it, and then make sure the kayak is secured to the cart to stop it from moving about.
Securing the kayak to the cart should be given a lot of attention particularly if the cart does not have suction cups to minimize movement.
Kayak lifting devices can also make life a lot easier by reducing the strain on your body every time you have to load and offload your kayak from your vehicle. They come in several types and brands so be sure to do appropriate research before choosing one.
Tip: Your Personal Flotation Device (PFD) can make lifting your kayak easier.
All you have to do is make sure you are wearing it, especially when you have to lift the kayak to your shoulder and it will provide a cushion or padding to your shoulder by bearing the brunt of the kayak’s weight.
That way, you can minimize the strain on your shoulder and be healthier.
How To Lift A Kayak Onto A Car
Of all the ways of transporting kayaks, cars are perhaps the most common, with most kayakers outfitting the op of their vehicle with kayak racks.
Knowing how to safely lift, and then load your kayak onto your vehicle can thus not be overemphasized as a lack of caution and know-how could result in damage to either or both your kayak and your vehicle or worse injury to yourself.
Having someone nearby to assist with the loading can be a great help, but several kayak lift assist devices also exist for the lone rangers out there to load their kayaks to their vehicles with no worries.
Be sure to use the roof rack best suited to your vehicle then load the kayak as safely as possible.
Several products to protect the kayak and vehicle exist, such as pool noodles that act as a rolling device to protect both the hull of your kayak and the roof of your car, so be sure to make inquiries and get affordable products to make sure your kayak and vehicle both stand the test of time.
Once loaded to your roof rack, you have to secure the kayak with straps, preferably cam straps. The straps are typically secured to the crossbars on the car roof but if your car lacks those, make sure the kayak is secured to something sturdy.
The aim is to secure the kayak such that the straps are tight enough to restrict movement, but not too tight that they damage the kayak. The bow and the stern of the kayak should also be secured.
The bow and stern lines should be used to secure the kayak to the front and back of the car to be sure the kayak will not move unless you loosen it.
If you have multiple kayaks to transport on the roof rack, you will have to repeat the procedure ensuring each kayak is secured such that it can’t move.
Remember to tie up any loose or free end of the straps when you are through and double-check your work before embarking on your journey. Drive safely and responsibly to your destination.
How To Lift A Kayak By Yourself
If you are a fan of kayaking, sooner or later you will find yourself in a position where you have to lift your kayak on your own, and knowing how to safely do so will spare you a lot of trouble.
It is thus imperative for all kayakers to learn how to safely lift their vessels on their own in a controlled environment before having to do so in real time.
Remember that practice makes perfect so make sure you practice lifting your kayak from time to time even after mastering the technique so you don’t get rusty. The steps to safely lift a kayak on your own are given below.
Step 1: Prepare Yourself
This step involves positioning yourself and your kayak for the impending lifting. The kayak should be positioned horizontally before you with the bow facing the direction you intend to move in and lifting the kayak.
If the bow is on your left, you will be carrying the kayak on your right shoulder. But if the bow is on your right, you will be carrying the kayak on your left shoulder.
If you favor one shoulder over the other, you simply have to move to the other side of the yak and you are good to go. You should be standing beside the cockpit.
Next, roll the kayak such that the cockpit faces away from you, and make sure you are in the center of the kayak. This is to make sure the kayak is not unbalanced and at risk of falling off your shoulder should it get to that height.
If you are making use of a lifting device, this step may not be necessary, but it is best to be prepared as you don’t know when you won’t have access to your lift aid.
Step 2: Use Your Legs
Once you’ve positioned yourself, you are ready to lift the kayak. The first thing to do at this point is to bend your knees and assume a squatting position.
You should then put your hands on the rim of the cockpit closest to you and lift the kayak onto your thighs.
This implies rising slightly from your squatting position with your knees still bent and placing the kayak carefully on your thighs. Remember that your thighs will bear the weight, and keep your knees bent, and you should be fine.
Once the yak is safely on your thighs, proceed immediately to step 3 as assuming this position for too long is uncomfortable and could lead to you dropping the kayak and possibly damaging it or injuring yourself.
If you feel particularly tired or unconfident in your ability to lift the kayak any higher at this point, do not give up. Simply return the kayak safely to the ground, take a break, and try again.
Remember you are practicing for the real deal, and you may not get it right away. Once you are confident you can handle it, move to step 3 once the kayak is on your thighs.
Step 3: Roll Up
This is the final and arguably the most difficult step. With your knees bent and your back straight, reach to the other side of the cockpit and grab the rim with your palms facing upward such that the cockpit now faces you.
Remember that the bow points in the direction you intend to travel, so the stern is naturally the opposite end. Now lift the kayak as you stand up and roll it onto your shoulder such that the rim rests on your shoulder in a comfortable position.
Try to stabilize the kayak on your shoulder and be mindful of your surroundings as you move it to its intended destination.
If you want to load it onto a car roof, you should be able to do so once the kayak is at shoulder height. Make sure you are careful when dropping the kayak on the roof rack to avoid any unnecessary damage.
If you want to portage the kayak this way, it is best if your kayak is not heavy and you are not going a long distance, as carrying kayaks can be awkward and easily tiring.
How Should 2 People Lift A Kayak?
While all kayakers should know how to lift a kayak alone, it is an undeniable fact that having a helping hand makes the task considerably easier and less straining.
The first thing to note here is that the two people carrying the yak should face the same direction, the direction in which they intend to travel and the kayak’s bow should face that direction too.
The next important factor when two people are carrying a kayak is communication and synchronization. The lead kayaker, that is the one facing the direction of travel, is to relay everything of note he sees to his partner so they can carry the kayak safely and avoid all obstacles to their destination.
Synchronization is important when lifting and dropping the kayak to prevent it from getting damaged. When two people have to carry a kayak a short distance, they simply need to position the kayak in the direction they intend to go and grab the handles of the kayak.
They should position themselves either on the same side or alternately, depending on what works best for them, with the lead person grabbing the bow handle while the other grabs the stern handle of the kayak, then moves the kayak to its intended destination.
Two kayaks can be carried or portaged at the same time similarly by two kayakers. They simply get in the middle of the kayaks, grab the bow and stern handles, and carry the kayaks to their destination.
If you intend to load a kayak onto a roof rack, for instance, the lifting procedure will be quite different from the one explained above. The steps for two people to safely lift a kayak are given below.
Step 1: Position Yourselves
After getting a willing partner, you are to place yourselves in a way that will make lifting the kayak easy and efficient.
The correct position is to simply put the kayak on the ground with each of you standing on the same side and facing the watercraft. You should each be at either end of the kayak.
Step 2: Lift The Kayak
Once in the appropriate position, you should both bend your knees while keeping your back straight then grab the handle closest to you. After ensuring you both hold a handle, you should lift the kayak at the same time.
That will put the kayak about waist level, high enough to be loaded to some lifting devices that will do the remaining work for you. If you don’t have a lifting device, however, proceed to step 3.
Step 3: Kayak At Shoulder Level
If you will be lifting the kayak to shoulder level before loading it onto the car or truck, the difference in your height must not be that great unless you will be faced with another set of problems. If your heights are compatible, you can safely pull this step.
Remembering to communicate and synchronize your movements, lift the kayak onto your shoulders. As each of you is at the end of the kayak, that should be easy enough, so you now have the hull of the kayak on your shoulders.
You should be able to safely load the kayak onto a roof rack in this position. Just be mindful of your surroundings and keep in mind that the lead carrier should communicate all obstacles to the person at the rear, and you will be fine.
How To Carry A Sit-On-Top Kayak By Yourself
Sit-on-top kayaks are popular particularly among anglers as they make excellent fishing watercraft.
That benefit, however, comes with the downside of them being very heavy, so we will look at some ways to carry a sit-on-top kayak briefly.
Using A Kayak Cart
One of the best ways to transport your sit-on-top kayak is to invest in a kayak cart or trolley, especially if you are covering a long distance.
That way, you simply have to load your kayak onto the cart, and you are good to go. One beauty of having a kayak cart is that it not only makes carrying your kayak easier, but it also does not take up much space in your vehicle when you are not using it.
An additional benefit is that it is usually possible to strap your cart to the bow or stern storage area of your kayak eliminating the need to walk back to your car to store the cart, meaning you can start paddling as early as possible.
Using A Kayak Carry Strap
Another easy way to carry a sit-on-top kayak is to make use of straps. Naturally, several straps exist on the market, so the exact method of use for each strap consequently varies, but most can be used as described below.
Kayak carry straps are generally designed to either be threaded through the scupper holes of your kayak or be secured around the hull of the kayak.
If your carry strap is the one that can be threaded through the scupper holes of your kayak, the front strap will be threaded through one of the scupper holes toward the bow of the kayak while the other will be threaded in the scupper hole towards the stern of the kayak.
To thread the straps through the holes, set the kayak on one of its gunwales and up against a tree or the side of your vehicle.
The scupper hole you thread the strap through will depend on your height. The aim is to carry the kayak so choose a hole that makes it possible to carry the kayak easily without it dragging on the floor.
Tighten the straps as per the manufacturer’s orders and you are good to go. To efficiently carry the kayak, put the straps on the shoulder opposite the side the kayak is on. That way, your weight will be more evenly distributed across your body.
You will notice that carrying a kayak by yourself, though not particularly fun, is not as difficult as it may seem. With a little practice, you will be able to load your kayak onto your vehicle and hit the water in no time.
Remember to always use proper safety equipment and techniques when handling your kayak. Now get out there and enjoy the paddle!